
Sign up for our newsletter
to get all the latest news and updates for North American Decal

How to Properly Label Your Product in 2025 to Avoid Misleading Claims

Did you know that in 2024 alone, over 60% of consumer complaints filed with regulatory agencies were related to misleading product labels? Yeah, labeling matters—a lot! Your product's label isn't just some piece of paper or packaging slapped on at the last minute. It's a vital communication tool that tells your customers everything they need to know about your product. It builds trust, ensures transparency, and, let’s be real, keeps you on the right side of the law. So, let’s talk about how to nail this whole labeling game and steer clear of any "oops" moments.
Why Accurate Product Labeling Matters
Accurate labeling might not seem like a big deal at first glance, but let me tell you, it’s the glue that holds your business and reputation together. Imagine buying a "100% organic" snack only to discover it’s packed with synthetic chemicals. Customers feel cheated, and your brand image? Poof—gone in seconds.
Proper labeling shows your customers that you respect them. It builds trust, and trust leads to loyalty—something every business needs to survive. Oh, and let’s not forget the legal side of things. Misleading claims can land you in hot water faster than you can say "lawsuit." Fines, penalties, and even product recalls can drain your finances and wreck your credibility. Not worth it, right?
I remember a friend of mine who tried to cut corners by labeling their product as "eco-friendly." They didn’t realize they needed to back that claim with proof. One regulatory fine later, they learned their lesson the hard way. Don’t be that friend.
Essential Elements of a Compliant Label

So, what makes a label compliant? Here’s the lowdown on what you absolutely, positively need to include:
Product Name: Make it clear and precise. No gimmicks, no confusion.
Ingredients and Materials: Full transparency is the name of the game. List everything—yes, even those tiny percentages of preservatives.
Net Weight/Volume: Accuracy here is non-negotiable. No one wants to buy a “500g” pack that’s actually 450g.
Manufacturer Info: Your name and address need to be on there. It’s like signing your work—own it!
You’d be amazed how many companies overlook these basics. One time, I bought a jar of honey, and the label didn’t even have the manufacturer’s name. Sketchy, right? Don’t be that brand.
Avoiding Deceptive Practices in Product Labels
We’ve all seen those too-good-to-be-true claims on products. “Cures all diseases” or “Burns fat overnight.” Yeah, no. Not only are these claims deceptive, but they also hurt your credibility in the long run.
Here’s a golden rule: If you can’t back it up with solid evidence, don’t put it on your label. Health claims, endorsements, and testimonials all need to be 100% legit. Trust me, nothing screams "unprofessional" like a fake endorsement.
A colleague once tried adding a “doctor-recommended” badge to their product without any actual recommendation. The backlash they faced on social media was brutal. Avoid shortcuts. They rarely end well.
Navigating Country-Specific Labeling Standards

Here’s where things can get a little tricky. Labeling standards vary depending on the country, and in North America, Canada and the U.S. have their own specific rules.
For example, in Canada:
"Made in Canada": At least 51% of the production costs must be Canadian, and the final transformation has to happen here. Oh, and don’t forget to add a qualifying statement like "with imported parts."
"Product of Canada": This one’s stricter—98% of production costs must be Canadian.
Mess this up, and you’re looking at fines or worse. Stay informed and double-check before you print anything.
Proactive Steps for Long-Term Labeling Compliance
Now, let’s talk about staying compliant in the long haul. The key is to make labeling compliance a habit, not a one-time task.
Regular Audits: Don’t wait for a mistake to find you. Conduct regular reviews of your labels to make sure everything checks out.
Stay Updated: Labeling regulations change all the time. Subscribe to industry newsletters or follow regulatory bodies to stay in the know.
Leverage Technology: Tools like label management software can save you a ton of time and headache. Automation is your friend.
I can’t stress enough how important this is. A small slip-up can snowball into a massive problem. My team once missed an update in labeling guidelines, and we had to redo an entire batch of products. It was exhausting and expensive—a mistake we’ll never make again.
Conclusion
Labeling your product isn’t just about slapping some info on a package. It’s about transparency, trust, and compliance. Nail these aspects, and you’ll not only avoid misleading claims but also build a brand your customers love and respect.
Take a moment to review your labels today. Need help? Reach out to us at https://www.northamericandecal.com/contact and share your story or ask for advice. After all, we’re all in this labeling game together!

Why European Defense Manufacturers Should Choose North American Decal

Introduction
Europe is on the verge of a defense manufacturing boom. With rising geopolitical tensions and increasing military budgets, European nations are accelerating the production of military vehicles, aircraft, and weapons. But with this surge in manufacturing comes an often-overlooked necessity: high-quality decals. Whether it’s for branding, compliance, or safety signage, decals are critical to ensuring smooth operations.
This is where North American Decal comes in. We provide top-tier, durable, and regulation-compliant decals tailored for the defense industry. From marking military-grade equipment to enhancing factory efficiency with clear safety labels, we help companies in the defense sector stay compliant, organized, and ahead of the game.
The Growing Demand for Decals in Europe's Defense Industry
The European defense sector is undergoing rapid expansion, and decals play an essential role in this transformation. Here’s why:
Increased Military Production – With defense spending rising, manufacturers must scale up production while maintaining compliance and organization.
Regulatory Compliance – Defense products require strict identification and warning labels to meet NATO, EU, and national regulations.
Durability Matters – Military environments are harsh. Decals must withstand extreme temperatures, chemicals, and abrasion.
Factory Efficiency – Beyond product marking, factories need clear, high-visibility signage for workflow optimization and worker safety.
Why North American Decal is the Perfect Partner for European Defense Companies

1. Industry-Leading Durability and Compliance
Decals for military use can’t be just any stickers. They must endure extreme conditions while maintaining readability and adhesion. North American Decal ensures:
High-performance materials that resist water, UV exposure, and chemical wear.
Regulation-compliant printing to meet European and NATO standards.
Military-grade adhesives that bond securely to metal, composites, and other tough surfaces.
2. Custom Solutions for Every Need
We understand that every defense manufacturer has unique requirements. That’s why we offer:
Custom military decals for vehicles, weapons, aircraft, and tactical equipment.
Multi-language safety and compliance labels to accommodate Europe’s diverse workforce.
Scalable printing solutions that can handle large or small production needs efficiently.
3. Advanced Printing Technologies
Cutting-edge printing technology is at the heart of what we do. Our advanced processes include:
High-resolution digital and screen printing for crisp, precise labels.
UV-resistant and anti-fade inks ensure longevity in rugged conditions.
Specialized adhesives that work across different defense-grade materials.
4. Fast Turnaround and Scalable Production
Military manufacturing operates on tight deadlines, and we make sure decals arrive on time, every time:
Rapid production cycles to meet urgent demands.
Bulk-order capacity to support large-scale defense projects.
Reliable supply chain solutions to prevent production bottlenecks.
Future-Proofing Your Manufacturing with North American Decal

The defense industry isn’t slowing down, and neither should your decal supply chain. Here’s how we help future-proof your operations:
Stay ahead of regulatory changes with always up-to-date compliance labels.
Adapt to emerging manufacturing trends with cutting-edge decal solutions.
Enhance factory safety and efficiency with clear, high-visibility signage.
Conclusion
With Europe’s defense sector expanding rapidly, the demand for durable, regulation-compliant decals is skyrocketing. North American Decal is the trusted partner you need to ensure seamless product identification, compliance, and factory efficiency.
Don’t let decal quality slow down your production. Contact North American Decal today and secure your supply chain with the best in the industry!

What is a Substantial Transformation and Why Does it Matter?

Introduction
In the intricate world of international trade, understanding the concept of "substantial transformation" is crucial. This term isn't just industry jargon; it plays a pivotal role in determining the country of origin for products, impacting everything from compliance with trade regulations to eligibility for preferential tariff rates. Imagine transforming raw ingredients into a delicious pizza or crafting a winter jacket from various materials—these processes exemplify substantial transformation. Let's dive into what this means and why it matters for businesses like yours!
Definition of Substantial Transformation
"Substantial transformation" is a term that might sound a bit technical, but it's actually pretty straightforward once you get the hang of it. Essentially, it refers to a process where a product undergoes a significant change in form, appearance, nature, or character, resulting in a new and distinct product. This isn't just about slapping a new label on something; it's about real, tangible changes.
For example, think about making a pizza. You start with raw ingredients like cheese, dough, and sauce. Through the process of baking, these ingredients transform into a delicious, cohesive dish. That's a substantial transformation in action! On the flip side, simply assembling a few pre-made components, like putting together a sandwich, wouldn't count as substantial transformation because the individual components don't undergo a significant change.
Understanding this concept is crucial for businesses involved in international trade because it determines the country of origin for products. This, in turn, affects compliance with trade regulations and eligibility for preferential tariff rates under various free trade agreements. So, getting a handle on what qualifies as substantial transformation can have a big impact on your bottom line.
Criteria for Substantial Transformation
Now that we've got a basic understanding of what substantial transformation is, let's dive into the criteria that determine whether a product has undergone this process. There are a few key factors to consider:
Value-Added Test: This involves assessing the percentage increase in value that results from the transformation process. For a product to be considered substantially transformed, a significant portion of its value must be added during the manufacturing process in the country in question.
Change in Tariff Classification: This criterion looks at whether the product's Harmonized System (HS) code changes as a result of the transformation. If the final product falls under a different tariff classification than its components, it likely qualifies as substantially transformed.
Specific Processing Operations: Certain manufacturing steps are considered substantial transformations in and of themselves. For example, cutting and sewing fabric to create a garment or molding raw plastic into a finished product.
Let's look at some examples to make this clearer. Imagine you're producing a winter jacket. If you import fabric and then cut, sew, and assemble it into a finished jacket in Canada, that's a substantial transformation. On the other hand, if you're just adding a zipper to an already-made jacket, that wouldn't count.
Understanding these criteria is essential for businesses to ensure their products meet the necessary standards for being labeled as "Made in Canada" or any other country. This not only helps with compliance but also boosts consumer confidence in the quality and origin of your products.
Examples of Substantial Transformation
To grasp the concept of substantial transformation, it helps to look at some concrete examples. Here are a few scenarios that illustrate what qualifies—and what doesn't:
Qualifying Examples:
Food Processing: Turning raw ingredients like flour, sugar, and eggs into a cake. The baking process fundamentally changes the ingredients into a new product.
Automotive Manufacturing: Molding imported sheet metal into car panels. The metal undergoes significant changes in form and function.
Furniture Production: Building a table from imported wood. The wood is cut, shaped, and assembled into a completely new product.
Non-Qualifying Examples:
Simple Assembly: Assembling a bicycle from pre-made parts. The components don't undergo significant changes.
Minor Processing: Printing designs on imported t-shirts. The T-shirts remain fundamentally the same product.
These examples highlight the importance of substantial transformation in determining the country of origin. It's not just about where the final product is assembled but where the significant changes occur.
Importance of Substantial Transformation in Trade
So, why does substantial transformation matter so much in the world of trade? There are several key reasons:
Determining Country of Origin: The country where the last substantial transformation occurs is considered the country of origin. This is crucial for labeling and marketing purposes, as well as for compliance with trade regulations.
Compliance with Trade Regulations: Many countries have specific rules about what qualifies as a product of their country. Meeting these criteria ensures that your products comply with these regulations, avoiding potential legal issues.
Eligibility for Preferential Tariff Rates: Under various free trade agreements, products that meet the substantial transformation criteria can benefit from reduced or eliminated tariffs. This can result in significant cost savings for businesses.
Consumer Confidence: Products labeled as "Made in Canada", or another country often carry a perception of higher quality. Ensuring your products meet the substantial transformation criteria can boost consumer confidence and enhance your brand's reputation.
Understanding and applying the concept of substantial transformation can have a profound impact on your business's success in the global market. It's not just about following the rules—it's about leveraging these rules to your advantage.
How North American Decal Can Help
At North American Decal, we understand the complexities of international trade and the importance of substantial transformation. Our high-quality decals and labels can play a crucial role in helping your products meet country-of-origin requirements.
Whether you're producing food items, automotive parts, or clothing, our decals and labels can help you communicate the origin of your products. This not only helps with compliance but also enhances your brand's image and consumer trust.
We're here to support you every step of the way. From designing custom labels to ensuring they meet all regulatory requirements, North American Decal is your partner in achieving trade compliance and business success.
Conclusion
Understanding substantial transformation is essential for navigating the complexities of international trade. By ensuring your products meet the criteria, you can benefit from preferential tariffs and comply with trade regulations. North American Decal is here to assist you with high-quality labels that emphasize your product's Canadian origin. Connect with us today to start your labeling project and ensure your products stand out in the market!
Connect with North American Decal today to explore your labeling requirements and find out how we can assist you in creating compliant, high-quality labels that emphasize your product's Canadian origin. Visit our website at www.nadecal.com or call us at +1 (416) 497-4767 to start your labeling project.

Understanding Substantial Transformation: Product of Canada vs. Made in Canada
Learn the key differences between "Product of Canada" and "Made in Canada" labels, what qualifies as a substantial transformation, and how North American Decal can help you meet labeling requirements.

Introduction:
Did you know that the label on your product can significantly impact consumer trust and sales? Understanding the difference between "Product of Canada" and "Made in Canada" is crucial for manufacturers and consumers alike. But what exactly qualifies as a substantial transformation? And how can North American Decal help you navigate these requirements? Let's dive in and explore these important distinctions!
What Qualifies as a Substantial Transformation?
Substantial transformation is a term that might sound a bit technical, but it's actually quite straightforward once you get the hang of it. Essentially, it refers to a significant change in the form, appearance, or nature of a product that adds value and makes it a new and different item. For example, turning raw lumber into a finished piece of furniture or processing raw fish into canned fish are both considered substantial transformations.

I remember when we first started dealing with substantial transformation requirements at North American Decal. It was a bit of a headache at first, trying to figure out what counted and what didn't. But over time, we learned the ropes and now it's second nature to us. One practical tip I can share is to always document every step of your manufacturing process. This not only helps in proving substantial transformation but also keeps your operations transparent and efficient.
In international trade, substantial transformation is crucial because it determines the country of origin for tariffs and trade agreements. For instance, if you import raw materials from one country and substantially transform them in Canada, the final product can be labeled as Canadian. This can have significant implications for tariffs and market access.
Product of Canada vs. Made in Canada:
Product of Canada:
The "Product of Canada" label is pretty prestigious. It means that at least 98% of the total direct costs of producing the product were incurred in Canada. This includes everything from raw materials to labor and overhead costs. Essentially, the product was made in Canada by Canadians, with negligible imported elements. For food items, it indicates that the majority, if not all, key ingredients, processing, and labor came from Canada.
I once had a client who was so proud of their "Product of Canada" label that they made it the centerpiece of their marketing campaign. And it worked! Their sales skyrocketed because consumers trusted the quality and authenticity of their products. So, if you can meet the criteria for this label, it's worth the effort.
Made in Canada:
The "Made in Canada" label is a bit more flexible. It means that more than 51% but less than 98% of the total direct costs of producing the product were incurred in Canada. It often includes a qualifying statement, such as "Made in Canada with imported parts" or "Made in Canada with 60% Canadian content and 40% imported content". The product must have undergone its last substantial transformation in Canada.
I remember a time when we had to help a client navigate the "Made in Canada" requirements. They were importing components from various countries and assembling them in Canada. It was a bit tricky to ensure they met the 51% threshold, but with careful planning and documentation, we got there. The key is to keep track of all your costs and ensure that the final substantial transformation happens in Canada.
Both labels require that the product's final substantial transformation occurred in Canada. By ensuring that significant manufacturing or the last substantial transformation of your product did take place domestically, North American Decal can help you meet the criteria for "Made in Canada" or "Product of Canada" labeling.
How North American Decal Can Help

At North American Decal, we pride ourselves on being experts in labeling requirements. We understand the complexities of Canadian regulations and can help you navigate them with ease. Our custom decal solutions are designed to meet your needs, ensuring compliance with all relevant standards.
One of our clients, a small food manufacturer, struggled to meet the "Product of Canada" criteria. They were sourcing some ingredients from abroad and weren't sure how to label their products. We worked closely with them to identify local suppliers and adjust their processes. In the end, they were able to proudly display the "Product of Canada" label on their products, which boosted their sales and brand reputation.
We offer a range of services, from custom decal design to compliance consulting. Our team is dedicated to helping you create high-quality labels that emphasize your product's Canadian origin. Whether you're a small business or a large corporation, we have the expertise and resources to support you.
Conclusion
Understanding the nuances of product origin labels can be complex, but it's essential for compliance and consumer trust. North American Decal is here to help you navigate these requirements with ease.
Contact North American Decal today to learn more about our custom labeling solutions! And remember, a well-labeled product not only meets regulatory standards but also builds consumer confidence and drives sales.
So, let's get started on making your products proudly Canadian! https://www.northamericandecal.com/contact

Made in Canada: Understanding the 2025 Tariff Requirements & Compliance Solutions

Introduction
Did you know that 78% of Canadian consumers prefer to purchase products made in Canada? However, displaying a "Made in Canada" label is not as simple as manufacturing within Canadian borders! With the implementation of the 2025 tariff regulations, businesses across North America are facing new challenges in properly labeling their Canadian-made products. The rules are stringent, and non-compliance can lead to significant penalties and loss of consumer trust. As we navigate these regulations together, understanding what truly qualifies as "Made in Canada" is more crucial than ever for manufacturers, retailers, and consumers alike.
I've spent over fifteen years helping businesses navigate the complexities of product labeling, and I can tell you that the 2025 tariff changes have created quite a stir in manufacturing circles. Just last month, I consulted with a kitchen appliance manufacturer who was completely unaware that their assembly process no longer met the updated "Made in Canada" requirements. They nearly shipped thousands of mislabeled products! This is precisely why understanding these regulations thoroughly is not just important—it's essential for business survival in today's competitive marketplace.
Understanding "Made in Canada" Under the 2025 Tariff Regulations

Let me break down what "Made in Canada" really means now that the 2025 tariff regulations have come into effect. I remember when these regulations were first announced, I was reviewing documentation for a client and actually spilled coffee all over my keyboard in surprise at some of the changes! The foundational requirement from the Competition Bureau of Canada remains that for a product to qualify as "Made in Canada," at least 51% of the total direct manufacturing costs must be incurred in Canada, and the product must undergo its last substantial transformation here. This percentage threshold is absolutely crucial to understand.
The 2025 tariff has significantly impacted these requirements by introducing stricter documentation standards and verification processes. Now, manufacturers must maintain detailed records of all production costs, including labor, materials, and overhead, specifically broken down by country of origin. I've helped dozens of businesses adapt their accounting systems to track these metrics properly, and it's been quite the learning curve for many of them! The new regulations also require quarterly verification rather than the previous annual reviews, adding another layer of complexity to compliance efforts.
Many business owners don't realize the important distinction between "Made in Canada" and "Product of Canada" labels. While "Made in Canada" requires that 51% of manufacturing costs occur domestically, "Product of Canada" is much more stringent, requiring 98% of production costs to be Canadian. This distinction has become even more important under the 2025 tariff regulations because they've introduced different duty rates for each category. I once worked with a food producer who was mistakenly using "Product of Canada" when they only qualified for "Made in Canada"—the potential fines would have been devastating!
The concept of "last substantial transformation" continues to be a cornerstone of the regulations but has been further clarified under the 2025 tariff rules. This requirement means that the final production stage that gives the product its essential character must occur in Canada. For example, if components are imported but assembled in Canada in a way that fundamentally changes their nature or purpose, the product may still qualify as "Made in Canada." However, simple operations like packaging, diluting, or minimal assembly typically don't count as substantial transformations. I've seen companies invest in expanding their Canadian operations specifically to ensure this transformation occurs domestically.
Under the new regulations, disclaimers have become more specific and prominent. Rather than simply stating "Made in Canada with domestic and imported parts," manufacturers must now specify the percentage of Canadian content and list the primary countries of origin for imported components if they exceed 10% of the production cost. The formatting requirements for these disclaimers have also changed—they must now be at least 50% of the size of the "Made in Canada" claim and in the same font and color. I learned this the hard way when a client's labels were rejected at customs because the disclaimer was too small!
The consequences of non-compliance with these labeling regulations have become much more severe under the 2025 tariff. Penalties now include not only fines of up to $250,000 for corporations but also potential import restrictions and mandatory public disclosure of violations. I've witnessed businesses scramble to correct labeling issues after receiving warning notices, and the reputational damage can be significant. One manufacturing client estimated that their labeling error cost them over $500,000 in recalled products, relabeling costs, and lost retail placement opportunities. Trust me when I say that getting this right from the start is much easier than dealing with the fallout of non-compliance!
Key Industries Affected by the 2025 Tariff Changes

The manufacturing sector has been hit particularly hard by the 2025 tariff changes, especially those businesses that rely on global supply chains. I've worked with furniture manufacturers who previously imported frames and fabrics from overseas while completing assembly in Canada. Under the new regulations, many of these companies have had to recalculate their Canadian content percentage and found themselves falling short of the 51% threshold. The evaluation of assembly processes has become much more granular, with customs authorities now distinguishing between "significant assembly" (which may qualify as substantial transformation) and "minimal assembly" (which typically doesn't).
The food and beverage industry faces unique challenges because the 2025 tariff includes special provisions for agricultural products. Products containing Canadian-grown ingredients can count a higher percentage of their value toward the "Made in Canada" threshold, but only if the agricultural production methods meet specific sustainability criteria. I recently helped a specialty jam producer navigate this complex landscape—they source berries from Canadian farms but use imported sugar and pectin. Under the new regulations, they needed to document not just the origin of their berries but also the farming practices used to grow them!
The textile and apparel industry has perhaps faced the steepest learning curve with the 2025 tariff changes. The regulations now require that cutting and sewing of garments must occur in Canada to qualify for "Made in Canada" status, regardless of where the fabric originated. This has led to a significant restructuring within the industry, with some companies bringing previously outsourced operations back to Canada. I've worked with clothing brands that have had to completely overhaul their supply chains and manufacturing processes to maintain their Canadian-made branding. One client invested over $2 million in new domestic production facilities specifically to meet these requirements.
Electronics and consumer goods manufacturers face compliance issues related to the complexity of their supply chains and the challenge of calculating Canadian content when products contain hundreds or thousands of components. The 2025 tariff introduced a new "component-level assessment" requirement for electronics, meaning that manufacturers must track not just the final assembly costs but also the origin of critical components like circuit boards and processors. I remember working with a small electronics company that had to implement an entirely new inventory management system just to track component origins properly. The investment was substantial, but ultimately necessary to maintain their "Made in Canada" labels.
The pharmaceutical and health product industry has seen specialized labeling requirements emerge under the 2025 tariff. These regulations establish different thresholds for research and development activities conducted in Canada versus physical manufacturing. Companies can now include a portion of Canadian R&D costs in their "Made in Canada" calculations, which has been a significant benefit to the pharmaceutical sector. I've helped several health product manufacturers recalculate their Canadian content percentages under these new rules, and some were pleasantly surprised to find they could now qualify for "Made in Canada" status when they previously couldn't.
There have been some remarkable success stories of businesses adapting to the new regulations. A kitchen appliance manufacturer I worked with completely redesigned their supply chain to source more components domestically, ultimately increasing their Canadian content from 43% to 67%. Not only did this ensure compliance with the "Made in Canada" requirements, but it also reduced their overall tariff burden and shipping costs. Another client, a furniture maker, invested in advanced manufacturing technology that allowed them to produce components previously imported from Asia, resulting in higher quality products, more jobs for Canadian workers, and full compliance with the new labeling regulations.
Benefits of Proper "Made in Canada" Labeling

The consumer preference for Canadian-made products is not just anecdotal—it's backed by solid research. A 2024 study from the Retail Council of Canada found that 78% of Canadian consumers prefer products made in Canada, and 64% are willing to pay a premium of up to 15% for domestic products. I've seen this preference translate into real sales advantages for my clients who properly leverage their Canadian manufacturing credentials. One specialty food client saw a 32% increase in sales after redesigning their packaging to prominently feature their "Made in Canada" status alongside information about their local sourcing practices.
The tariff advantages for compliant businesses are substantial under the 2025 regulations. Products that qualify as "Made in Canada" face reduced import duties on necessary foreign components and may qualify for preferential treatment in various trade agreements. I once calculated the annual savings for a medium-sized manufacturer at over $175,000 just from the reduced duties on imported components used in their "Made in Canada" products. This cost advantage can be significant in competitive markets where price sensitivity is high. Additionally, companies with properly documented "Made in Canada" status typically clear customs more quickly, reducing shipping delays and associated costs.
The marketing advantages of Canadian production extend beyond just domestic markets. Internationally, Canadian-made products often carry connotations of quality, ethical production, and safety. I've worked with several brands that have successfully leveraged their Canadian manufacturing as a key selling point in export markets, particularly in Asia and Europe where Canadian products are highly regarded. One client specializing in baby products found that their "Made in Canada" status was their most valuable marketing asset when entering the Chinese market, where concerns about product safety have made Canadian-made items highly desirable.
Proper labeling contributes significantly to supply chain transparency, which has become increasingly important to both consumers and regulatory bodies. The detailed documentation required for "Made in Canada" compliance creates a comprehensive record of component sourcing and manufacturing processes. I've seen firsthand how this transparency can build trust with consumers and reduce the risk of supply chain disruptions. One client discovered potential quality and ethical issues with a supplier during their "Made in Canada" documentation process, allowing them to address these problems before they affected their products or reputation.
There are numerous examples of businesses successfully leveraging their Canadian manufacturing credentials. A kitchen tool manufacturer I worked with created an entire marketing campaign around their "Made in Canada" status, featuring the Canadian craftspeople who make their products and highlighting the quality advantages of domestic production. Their sales increased by 45% in the following year. Another client, a furniture maker, found that their "Made in Canada" labeling allowed them to command a 20% price premium in the marketplace while maintaining strong sales growth. These businesses have turned their compliance obligations into competitive advantages.
From the consumer perspective, authentic Canadian-made products carry significant value. Consumers associate Canadian manufacturing with higher quality standards, ethical labor practices, and environmental responsibility. I've conducted focus groups where participants consistently expressed greater trust in products labeled as Canadian-made and greater willingness to pay premium prices for these items. One participant memorably told me, "When I see 'Made in Canada,' I feel confident that the product wasn't made in a sweatshop and won't fall apart after a week." This consumer confidence translates directly into brand loyalty and repeat purchases for companies that can legitimately claim Canadian origin.
Common Challenges in "Made in Canada" Compliance

Supply chain tracking presents one of the most significant challenges in "Made in Canada" compliance. The 2025 tariff regulations require businesses to document the origin of every component and the associated manufacturing costs, which can be incredibly complex for products with dozens or hundreds of parts. I've helped numerous clients implement digital tracking systems that integrate with their existing inventory management software to maintain this documentation. One manufacturing client reduced their compliance documentation time by 70% after implementing a specialized tracking system that automatically calculated Canadian content percentages based on their component sourcing data.
The cost calculation methods for determining the 51% threshold have become more complex under the 2025 tariff. Manufacturers must now distinguish between direct manufacturing costs (which count toward the threshold) and indirect costs (which don't). Direct costs include materials, labor, and production overhead directly attributable to the product, while indirect costs like general administrative expenses and marketing are excluded. I remember working with a client who was incorrectly including design and engineering costs in their calculations—once we properly re-categorized these expenses as direct manufacturing costs (since they were directly related to production), their Canadian content percentage increased from 48% to 56%, allowing them to use the "Made in Canada" label.
Documentation requirements for proving compliance have become significantly more stringent. Manufacturers must maintain detailed records of component origins, manufacturing processes, and cost allocations, all of which must be readily available for audit. I recommend that my clients create a "compliance dossier" for each product, containing all relevant documentation in one place. This preparation has proved invaluable during customs inspections and Competition Bureau audits. One client who followed this advice was able to clear a surprise compliance audit in just two days, while their competitor (who had not maintained proper documentation) faced weeks of disruption and ultimately received a substantial fine.
The challenge of dealing with mixed-origin components is particularly vexing. Many manufacturers source materials that themselves contain components from multiple countries. Under the 2025 regulations, businesses must trace origins through multiple tiers of their supply chain, which can be exceptionally difficult. I've helped clients develop supplier agreements that require detailed origin information for all components, making this process more manageable. In some cases, we've had to work with suppliers to create custom reporting systems that track this information effectively. While challenging to implement, these systems ultimately create valuable supply chain visibility that extends beyond just compliance benefits.
The verification process and audits under the 2025 tariff have become more rigorous and frequent. The Competition Bureau and Canada Border Services Agency now coordinate their enforcement efforts, conducting joint audits of "Made in Canada" claims. I always advise my clients to conduct regular internal audits using the same methodology as the regulatory authorities—this proactive approach has helped many businesses identify and address compliance issues before they become problems. One client discovered during a self-audit that a supplier had changed their manufacturing location without notification, which would have compromised their "Made in Canada" status if not detected and corrected.
When compliance issues do arise, having a structured process for addressing them is crucial. First, businesses should immediately assess the scope of the problem and determine whether products already in the market are affected. Next, they should correct the underlying issue, whether that involves changing suppliers, modifying manufacturing processes, or updating cost calculations. Finally, they may need to notify regulatory authorities and develop a remediation plan for mislabeled products. I helped one client navigate this process after they discovered a compliance issue affecting thousands of units already in distribution. By proactively contacting the Competition Bureau with a detailed remediation plan, they were able to resolve the situation with minimal penalties and preserve their customer relationships.
Best Practices for "Made in Canada" Labeling Implementation

Assessing your product's eligibility for "Made in Canada" claims requires a systematic approach. I recommend starting with a comprehensive analysis of your supply chain and manufacturing processes. First, list all components in your product and identify their countries of origin. Next, calculate the direct manufacturing costs associated with each component and process. Then, determine what percentage of these costs occurs in Canada. Finally, identify the location where the last substantial transformation takes place. I've guided numerous businesses through this assessment process, and many are surprised to discover they're closer to qualifying for "Made in Canada" status than they initially thought. One furniture manufacturer realized that by slightly adjusting their production process to perform more finishing work in Canada, they could increase their Canadian content from 49% to 53%, qualifying them for the valuable "Made in Canada" designation.
Documenting manufacturing costs and processes properly is essential for compliance. Create a standardized system for tracking all direct manufacturing costs by country, including materials, labor, and production overhead. Maintain detailed records of supplier certifications regarding component origins. Document each production step with location information and associated costs. I advise my clients to implement digital tracking systems that integrate with their existing ERP software to streamline this documentation process. When working with a bicycle manufacturer, we implemented a barcode scanning system that tracked components from receipt through final assembly, automatically calculating Canadian content percentages and generating compliance documentation. This system reduced their documentation time by 80% while improving accuracy.
Clear communication with suppliers about origin requirements is crucial. Develop a supplier compliance program that clearly communicates your need for detailed origin information. Include origin documentation requirements in all supplier contracts and purchase orders. Conduct regular supplier audits to verify the accuracy of origin claims. I've found that creating a supplier compliance guide with clear examples and templates significantly improves the quality and consistency of the information you receive. When one client implemented such a program, their rate of incomplete or inaccurate supplier documentation dropped from 45% to less than 5% within six months. This improved data quality directly translated to more efficient compliance processes and reduced the risk of regulatory issues.
Designing compliant labels requires balancing regulatory requirements with marketing needs. Ensure that "Made in Canada" claims are accurate and appropriately qualified with any required disclaimers. Position these claims prominently but integrate them seamlessly into your overall package design. Use clear, legible fonts that meet size requirements for disclaimers (at least 50% as large as the "Made in Canada" claim). I've worked with designers who initially viewed compliance requirements as constraints but ultimately created more effective packaging by treating regulatory elements as integral design components. One beauty product client integrated their "Made in Canada" messaging so effectively into their brand story that it became a central selling point rather than just a compliance element.
Auditing your current labeling practices against the 2025 requirements should be a regular activity. Conduct quarterly internal audits of your "Made in Canada" documentation and labeling. Compare your practices against the latest regulatory guidance from the Competition Bureau. Review supplier certifications and update your documentation as supply chains change. I recommend creating a compliance calendar that schedules regular reviews of all aspects of your "Made in Canada" program. One manufacturing client discovered during a scheduled audit that changes in their production process had actually increased their Canadian content, allowing them to remove a disclaimer from their labeling that had previously been required. This simplified labeling improved consumer perception of their products.
Implementing changes to meet compliance deadlines requires careful planning. Develop a timeline that accounts for all aspects of the transition, including design updates, regulatory reviews, and inventory management. Communicate changes clearly to all stakeholders, including retailers and distributors. Consider a phased approach to minimize disruption and costs. I've guided many businesses through compliance transitions, and proper planning makes all the difference. An appliance manufacturer I worked with developed a six-month implementation plan that coordinated label design changes, production updates, and inventory management to ensure a smooth transition to the new requirements without any non-compliant products reaching the market. Their methodical approach prevented the significant costs associated with rushed compliance efforts, such as expedited printing fees or product recalls.
How North American Decal Provides Labeling Solutions
North American Decal has established itself as the leading expert in regulatory-compliant labeling across North America. With over twenty years of experience navigating changing regulations, their team possesses unparalleled knowledge of the 2025 tariff requirements. I've personally collaborated with their compliance specialists on numerous projects, and their attention to detail is exceptional. Their expertise extends beyond just printing labels—they provide comprehensive consultations to ensure that your labeling strategy fully complies with all relevant regulations while effectively communicating your Canadian manufacturing credentials to consumers.
The company offers customized labeling solutions tailored to the specific needs of various industries. For food products, they provide durable, food-safe labels that maintain compliance while withstanding cold, heat, and moisture. For industrial equipment, they create labels engineered to resist harsh conditions, UV exposure, and chemical contact. I've seen their labels maintain perfect legibility on outdoor equipment after years of exposure to Canadian winters! Their design team works closely with clients to create labels that not only meet regulatory requirements but also enhance brand identity and product appeal. They understand that a compliance label can also be a powerful marketing tool when properly designed.
North American Decal has developed specialized services to help businesses navigate the 2025 tariff requirements. Their compliance audit service reviews your current labeling against the latest regulations, identifying potential issues before they become problems. Their documentation assistance helps manufacturers properly calculate and verify their Canadian content percentages. I've referred several clients to their tariff consultation service, which guides maximizing the benefits of "Made in Canada" status while ensuring full compliance. One client reduced their annual compliance costs by 35% after implementing North American Decal's recommended procedures.
Quality assurance is a cornerstone of North American Decal's operations. Every label undergoes rigorous testing to ensure durability, legibility, and adherence to regulatory specifications. Their production facility utilizes advanced quality control systems that verify dimensions, colors, and text accuracy on every label produced. I've toured their production facility and was impressed by the multiple checkpoints throughout the manufacturing process. This commitment to quality means that their labels consistently meet or exceed regulatory requirements for size, placement, and content of "Made in Canada" claims and associated disclaimers.
The company's innovative labeling technologies address the diverse needs of different product materials and environments. They offer specialized adhesives formulated for challenging surfaces like silicone, textured plastics, and powder-coated metals. Their tamper-evident labels provide security features for products requiring authentication. I was particularly impressed with their new line of eco-friendly labels made from sustainable materials that maintain full regulatory compliance while reducing environmental impact. One client in the outdoor equipment industry switched to these labels and found they outperformed their previous petroleum-based labels in durability tests.
The testimonials from satisfied clients speak volumes about North American Decal's effectiveness. A major food processor reported, "North American Decal's expertise saved us from a potential labeling disaster when the 2025 tariff regulations were implemented. Their guidance helped us maintain our 'Made in Canada' status without interrupting production." An electronics manufacturer noted, "Their labels pass every compliance check with flying colors, and their consultation services helped us navigate the component-level assessment requirements that initially seemed overwhelming." These experiences align with what I've observed—North American Decal consistently delivers solutions that address both the technical and strategic aspects of regulatory compliance.
Conclusion
Navigating the complex regulations surrounding "Made in Canada" labeling in 2025 requires expertise and attention to detail. By understanding the requirements, addressing common challenges, and partnering with industry experts like North American Decal, your business can confidently promote its Canadian-made products while ensuring full compliance with all regulations. Don't let labeling concerns prevent you from leveraging the significant market advantages of Canadian manufacturing.
Throughout this article, we've explored how the 2025 tariff has transformed the landscape for "Made in Canada" labeling, from the fundamental 51% manufacturing cost requirement to the nuanced distinctions between different types of Canadian origin claims. We've examined the challenges facing various industries and provided practical strategies for addressing common compliance issues. As we've seen, proper labeling isn't just about avoiding penalties—it's about capitalizing on the substantial marketing advantages that come with authentic Canadian manufacturing credentials.
I encourage you to assess your current labeling practices against the information provided here and consider how your business might better leverage its Canadian manufacturing activities. Remember that compliance is an ongoing process that requires regular attention as regulations evolve and supply chains change. Whether you're just beginning to explore "Made in Canada" labeling or looking to optimize your existing compliance program, the effort invested will pay dividends in consumer trust, market positioning, and regulatory security.
For businesses seeking expert guidance on navigating these complex regulations, North American Decal offers comprehensive labeling solutions tailored to your specific needs. Their team of specialists can help you design compliant, high-quality labels that effectively communicate your product's Canadian origin while enhancing your brand identity.
Contact North American Decal today to discover how their expert labeling solutions can help you showcase your product's Canadian origin with pride and precision.

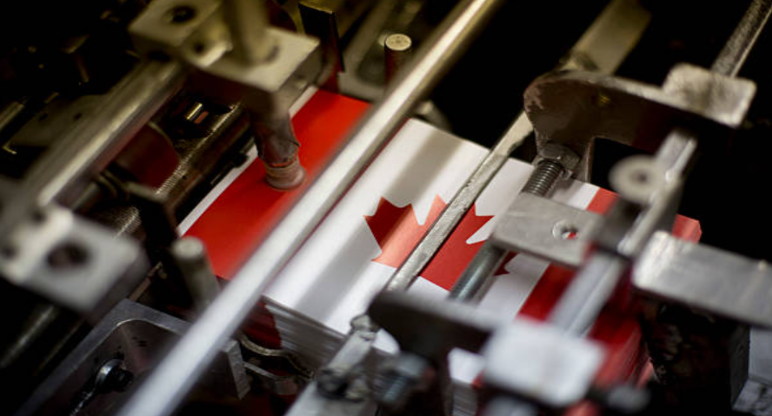
North American Decal: Premium Canadian Decals from a Trusted Canadian Company

Introduction
North American Decal is a leading Canadian company specializing in high-quality Canadian decals. Every product is proudly crafted in Canada, ensuring superior craftsmanship and supporting local communities. With a dedicated team of 35 skilled Canadians, our passion for innovation and commitment to excellence has made our decals a trusted product of Canada for over six decades.
A Legacy of Excellence

Since our founding in 1964, North American Decal has evolved from a modest operation into a powerhouse in the decal industry. Our journey is fueled by the hard work and vision of our founders and generations of Canadians who continue to drive our legacy of creating exceptional Canadian decals.
Commitment to Canadian Manufacturing

At North American Decal, manufacturing our products entirely in Canada is a core principle. This steadfast commitment not only upholds the highest quality standards but also supports the Canadian economy by creating local jobs. Our state-of-the-art 30,000 sq. ft. facility in Markham, Ontario, is a beacon of innovation where advanced technology meets skilled craftsmanship to produce leading-edge decals.
The Manufacturing Process

We blend traditional techniques with modern technology to create durable and visually stunning Canadian decals. Utilizing methods such as screen printing and digital printing, each step of our manufacturing process is executed with meticulous attention to detail, ensuring that every product is a true product of Canada.
Safety and Environmental Responsibility

North American Decal is at the forefront of environmental stewardship. As the first Canadian printing company to sign an agreement with Environment Canada, we are dedicated to reducing emissions and using sustainable materials. Our environmentally responsible practices highlight our commitment to safety and sustainability in every Canadian decal we produce.
Inventory Management and Customer Service

Our robust inventory management system ensures that our customers receive the Canadian decals they need, exactly when they need them. Trusted by prominent clients like John Deere, our reliable delivery and exceptional customer service make us a preferred Canadian company in the decal industry.
Leadership and Team

Led by dedicated professionals, including President and CEO Shobhit Shanker and Office Manager Rhena Lachapelle, our leadership team brings years of expertise and a passion for excellence. Their guidance continues to shape North American Decal as a leading manufacturer of Canadian decals and a proud product of Canada.
Innovation and Future Growth

We are continually exploring new materials and technologies to enhance our Canadian decals. Our commitment to innovation ensures that North American Decal remains at the cutting edge of the industry, consistently delivering products of Canada that set the benchmark for quality and performance.
Discover the Canadian Difference

North American Decal isn’t just a manufacturer—it’s a proud Canadian institution that embodies quality, innovation, and community. Experience the exceptional craftsmanship of our Canadian decals and join us in supporting a true Canadian company.
Get in touch today to learn more about our products in Canada and how our decals can elevate your brand.

10 Eye-Catching Decal Ideas to Make Your Truck Stand Out
Are you looking to give your truck a fresh new look? Truck decals are an awesome way to make your vehicle pop and show off your style. Whether you want to advertise your business or just make your truck look cool, we've got some great decal ideas for you. In this article, we'll explore 10 creative decal designs that will turn heads on the road. We'll also share tips on choosing the right decal and why they're so great for trucks. So buckle up and get ready for some truckin' inspiration!
Why Put Decals on Your Truck?
Before we dive into the cool designs, let's talk about why truck decals are so awesome. First off, they're a great way to make your truck unique. With so many trucks on the road, decals help yours stand out from the crowd. If you own a business, truck decals are like a moving billboard. They can advertise your company wherever you go, potentially reaching thousands of people every day.
Decals aren't just for looks, either. They can actually protect your truck's paint from scratches and sun damage. Plus, they're way cheaper than a custom paint job and much easier to change if you want a new look down the road.
Top 10 Decal Ideas for Your Truck
Now, let's get to the fun part - the decal ideas! Here are 10 eye-catching designs to consider for your truck:
1. Simple Company Logo
If you're a business owner, putting your company logo on your truck is a no-brainer. Keep it clean and simple for the biggest impact. A well-designed logo on your truck doors or tailgate can turn your everyday drives into free advertising.
2. Full Truck Wrap with 3D Graphics
Go big or go home, right? A full truck wrap with 3D graphics can transform your ride into a moving piece of art. These wraps cover your entire truck and can feature amazing 3D designs that seem to pop right off the vehicle. They're sure to grab attention wherever you go.
3. Patriotic Themes
Show your love for your country with patriotic decals. American flags, eagles, or other national symbols make bold statements on trucks. These designs are especially popular with veterans and those who want to show their national pride.
4. Optical Illusion Decals
Want to really mess with people's heads? Optical illusion decals can make your truck look like it's see-through, melting, or even floating! These mind-bending designs are sure to turn heads and start conversations.
5. Custom Quotes or Sayings
Got a favorite saying or inspirational quote? Put it on your truck! Custom text decals let you share your personality or beliefs with the world. Just remember to keep it short and sweet so people can read it quickly as you drive by.
6. Nature-Inspired Designs
Bring the outdoors to your truck with nature-inspired decals. Think forest scenes, mountain landscapes, or ocean waves. These designs are great for outdoor enthusiasts or businesses related to nature or eco-friendly products.
7. Geometric Patterns
For a modern, stylish look, try geometric pattern decals. These can range from simple repeating shapes to complex, colorful designs. They're a great way to add visual interest without being too flashy.
8. QR Code Decals
Here's a neat idea for tech-savvy business owners: QR code decals. Put a QR code on your truck that people can scan with their phones to visit your website or get more info about your business. It's like a high-tech business card on wheels!
9. Vintage or Retro Styles
Give your truck a blast from the past with vintage-style decals. Old-school lettering, retro color schemes, or classic designs can make your modern truck look charmingly old-fashioned. This style works great for businesses wanting to evoke a sense of tradition or nostalgia.
10. Seasonal or Holiday Themes
Keep your truck decals fresh by changing them with the seasons. You could have special designs for holidays like Christmas or Halloween, or switch up your look for summer and winter. This is a fun way to keep your truck's appearance interesting all year round.
How to Choose the Right Decal for Your Truck
With so many cool options, how do you pick the right decal for your truck? Here are some things to think about:
Purpose: Are you advertising a business or just personalizing your truck? This will help narrow down your choices.
Size: Consider the size of your truck and where you want to put the decal. A huge design might look great on a big rig but could overwhelm a smaller pickup.
Color: Choose colors that look good with your truck's paint job. Also, think about visibility - you want your decal to stand out, not blend in.
Durability: If you live somewhere with harsh weather, make sure to choose decals that can stand up to sun, rain, or snow.
Your Style: Most importantly, pick a design you love! Your truck is an extension of you, so choose decals that reflect your personality or business brand.
Applying Your New Decal
Once you've chosen your awesome new decal, it's time to put it on your truck. While you can do this yourself, it's often best to have a professional do it, especially for large or complex designs. They have the tools and know-how to make sure your decal looks perfect and lasts a long time.
Before applying, make sure your truck is super clean. Any dirt or grime can stop the decal from sticking properly. Also, try to apply your decal in a place out of direct sunlight and wind for the best results.
Taking Care of Your Truck Decals
To keep your new decals looking great, you'll need to take good care of them. Here are some quick tips:
Wash your truck regularly, but avoid pressure washers as they can damage the decals.
Use mild soap and water instead of harsh chemicals when cleaning.
If you live somewhere hot and sunny, try to park in the shade when possible to protect your decals from fading.
For small tears or peeling edges, you can often fix them with a bit of clear nail polish or decal glue.
With proper care, your truck decals can look awesome for years to come!
Rev Up Your Truck's Look Today!
Truck decals are an amazing way to make your vehicle stand out, advertise your business, or just show off your style. From simple logos to mind-bending 3D wraps, there's a decal design out there for every truck and every driver. Remember to choose a design that fits your needs and personality, and don't be afraid to get creative!
Ready to give your truck an eye-catching new look? Check out North American Decal for all your custom decal needs. They specialize in vehicle wraps, safety labels, window graphics, and more. Whether you need a simple logo or a full truck wrap, their team of experts can bring your vision to life. Visit North American Decal to start your truck's transformation today!

Free Recycling Decals: Your Guide to Finding Them Near You
Are you looking for ways to make recycling easier and more fun? Free recycling decals might be just what you need! These colorful stickers can help you and your family remember what goes in each bin. In this article, we'll show you where to find free recycling decals in your area and how to use them. Let's dive in and make recycling a breeze!
Why Use Recycling Decals?
Recycling decals are like little helpers that stick on your bins. They show pictures of what should go inside each container. This makes it super easy for everyone to know where to put their trash and recyclables. Using these stickers can:
Help the environment by making sure the right things get recycled
Teach your family and friends about recycling
Make your recycling bins look cool and organized
Where Can You Find Free Recycling Decals?
Now, let's explore some places where you might find free recycling decals near you:
Your Local Government
Many cities and towns give out free recycling decals. They want to help people recycle better. Here's what you can do:
Check your city's website
Call your local recycling center
Ask at community events or town hall meetings
Sometimes, they even mail these stickers right to your home!
Environmental Groups
Lots of groups that care about the earth offer free recycling decals. They might have offices near you or send stickers by mail. Some popular groups are:
Keep America Beautiful
The Recycling Partnership
Local nature centers or eco-clubs
These groups often have fun designs and might give you extra info about recycling too.
Businesses That Care
Some stores and companies give out free recycling decals. They do this to show they care about the environment. Places to check are:
Grocery stores
Home improvement shops
Office supply stores
Next time you're shopping, ask if they have any free recycling stickers!
How to Use Your Recycling Decals
Once you get your hands on some cool recycling decals, here's how to use them:
Clean your recycling bins
Stick the decals where everyone can see them
Make sure the pictures match what goes in each bin
You can even turn it into a fun activity with your family. Let kids help put the stickers on and learn about recycling at the same time.
Make Your Own Recycling Decals
Can't find free decals? No problem! You can make your own. Here's how:
Draw pictures of recyclable items
Print them on sticky paper
Cut them out and stick them on your bins
This is a great way to get creative and make recycling even more fun.
Tips for Recycling Success
Using decals is just the start. Here are some more tips to become a recycling pro:
Rinse containers before recycling
Flatten cardboard boxes
Keep plastic bags out of the recycling bin
Check what your local center accepts
Remember, good recycling habits help keep our planet clean and healthy!
Recycling Decals in Action
Let's look at how recycling decals have helped real people:
In Green Town, USA, they gave out free recycling decals to everyone. After just one month, they saw 30% more correct recycling! People found it easier to sort their trash, and it was fun too.
At Sunny Elementary School, kids designed their own recycling decals. They put them all over the school. Soon, everyone was recycling better, and the school even won an award for being eco-friendly!
Wrapping Up
Free recycling decals are a simple but powerful tool. They make recycling easier, more fun, and help us take better care of our planet. Here's what to remember:
Check with your local government for free decals
Look for environmental groups that give them out
Some businesses offer free recycling stickers too
You can always make your own if you can't find any
Use the decals to teach others about recycling
Now it's your turn! Go out and find some awesome recycling decals. Your bins (and the earth) will thank you!
---
Looking for more ways to make a difference? Check out North American Decal for custom printing solutions that can help spread your eco-friendly message. From vehicle wraps to safety labels, they have everything you need to make your mark. Visit northamericandecal.com to learn more about their services and how they can help you create eye-catching, environmentally conscious designs.

Custom In-Memory Decals: A Heartfelt Way to Remember Loved Ones
In-memory decals are special stickers that help us remember people we've lost. These custom-made decals are a beautiful way to keep memories alive. They're not just stickers – they're a way to share love and honor those who are no longer with us. In this article, we'll explore everything you need to know about custom in-memory decals. Whether you're considering getting one or just curious, this guide will help you understand why these decals are so meaningful to many people.
What Are Custom In-Memory Decals?
Custom in-memory decals are special stickers made to remember someone who has passed away. These decals are often put on cars, but they can go on other things too. People choose what they want on the decal, like the person's name, important dates, or a special message. These stickers are made to last a long time, even in sunshine and rain.
Why Do People Use In-Memory Decals?
There are many reasons why people choose to use in-memory decals:
To remember: The decal serves as a constant reminder of the loved one.
To share: It's a way to tell others about someone special who is no longer here.
To feel close: Having the decal nearby can make people feel closer to the person they've lost.
To honor: It's a way to show respect and love for the person who has passed away.
Many people find comfort in seeing their loved one's name or a special message every day. It's like carrying a little piece of that person with them wherever they go.
How Are Custom In-Memory Decals Made?
Custom in-memory decals are made with care and attention to detail. Here's how they're created:
Material: They use special vinyl that can handle sun and rain.
Design: People choose what they want on the decal, like names, dates, or pictures.
Printing: The design is printed onto the vinyl using strong inks.
Cutting: The decal is cut to the right shape and size.
The result is a high-quality sticker that looks good and lasts for years. Some decals can even last for five years or more in direct sunlight!
What Can You Put on an In-Memory Decal?
When it comes to designing your in-memory decal, you have lots of choices. Here are some ideas:
The person's name
Dates of birth and death
A special saying or quote
A picture or symbol that reminds you of the person
Angels, hearts, or other meaningful images
Remember, this decal is about your loved one, so choose things that feel right to you. There's no wrong way to design an in-memory decal.
Where Can You Put In-Memory Decals?
In-memory decals are very versatile. Here are some popular places to put them:
Car windows (especially the back window)
Truck windows
Walls
Laptops or tablets
Water bottles or travel mugs
The most common place is on a car's back window. This way, you can see it every time you use your car, and others can see it too.
How Big Should an In-Memory Decal Be?
The size of your decal depends on where you want to put it. Here are some tips:
For car windows, 6 to 21 inches wide is common.
Smaller decals (6-9 inches) work well in window corners.
Larger decals (12-21 inches) look good in the center of a back window.
For other items, like water bottles, smaller sizes work best.
Choose a size that fits well where you want to put it and allows people to read it easily.
What Colors Work Best for In-Memory Decals?
Color is important for in-memory decals. Here's what you should know:
White is very popular because it stands out well on dark surfaces.
Bright colors like yellow or pink are easy to see.
Dark colors like black or navy blue work better on light backgrounds.
Think about where you'll put the decal when choosing colors. You want it to be easy to see and read.
How Do You Order a Custom In-Memory Decal?
Ordering a custom in-memory decal is easier than you might think:
Find a company that makes custom decals.
Use their online design tool or send them your ideas.
Choose the size, colors, and text you want.
Review your design and make any changes.
Place your order and wait for it to arrive.
Many companies can make and ship your decal within a few days. Some even offer discounts if you order more than one.
How Do You Put on an In-Memory Decal?
Putting on your decal is not too hard, but it's important to do it carefully:
Clean the surface where you'll put the decal.
Peel off the backing carefully.
Place the decal where you want it.
Smooth it out from the center to the edges.
If you see bubbles, use a pin to make a tiny hole and push the air out.
Take your time with this step. If you're careful, your decal will look great and stay on for a long time.
Are In-Memory Decals Only for Sad Times?
While in-memory decals are often used after someone has passed away, they can also be used in other ways:
To celebrate someone's life
To remember happy times
To support a cause that was important to someone
To keep a loved one's memory alive in a positive way
These decals don't have to be sad. They can be a beautiful way to share love and keep special memories close.
In Conclusion
Custom in-memory decals are a special way to remember and honor loved ones. They're easy to order, come in many styles, and can last for years. Whether you put one on your car, in your home, or on a personal item, it's a meaningful way to keep someone's memory close to your heart.
Here are the key things to remember about custom in-memory decals:
They're personalized stickers to remember loved ones.
You can choose the design, size, and colors.
They're made to last, even in sunlight.
They can go on cars, walls, and many other places.
Ordering is easy and can be done online.
They're a positive way to keep memories alive.
Custom in-memory decals are more than just stickers – they're a way to share love, honor memories, and keep those we've lost close to our hearts.
---
Are you looking to create a custom in-memory decal or other personalized printing solutions? North American Decal specializes in creating high-quality, custom printing products including vehicle wraps, safety labels, window graphics, and large-format signs. Our expert team uses both silkscreen and digital printing techniques to bring your ideas to life. Whether you're honoring a loved one or looking for branding and advertising tools for your business, we're here to help. Visit North American Decal to explore our services and start your custom project today.

Awesome Off-Road Decals to Make Your 4x4 Stand Out
Are you ready to take your 4x4 adventure to the next level? Custom off-road decals are a great way to make your vehicle look cool and show off your love for the outdoors. In this article, we'll explore the top 10 custom off-road decals that will make your 4x4 the talk of the trail. Whether you're a seasoned off-roader or just starting out, these decals will add personality and style to your ride. Let's dive in and discover how you can transform your vehicle into a true off-road masterpiece!
Why Custom Off-Road Decals Are Awesome
Custom off-road decals are more than just stickers. They're a way to express yourself and make your 4x4 unique. Here are some reasons why off-road enthusiasts love these decals:
They make your vehicle look cool and stand out from the crowd.
Decals can protect your paint from scratches and small dings.
They show off your passion for off-roading and outdoor adventures.
Custom decals let you personalize your ride to match your style.
Now that we know why off-road decals are so popular, let's check out the top 10 designs that will make your 4x4 look amazing!
Top 10 Custom Off-Road Decals for Your 4x4
1. Mountain Silhouette
A mountain silhouette decal is perfect for nature lovers. It looks great on the side of your vehicle and reminds you of the adventures waiting in the great outdoors. This decal works well in black or white, depending on your vehicle's color.
2. Compass Rose
Show your love for exploration with a compass rose decal. This classic design looks great on the hood or doors of your 4x4. It's a symbol of adventure and finding your way in the wilderness.
3. Tire Tracks
Tire track decals are a fun way to show off your vehicle's off-road capabilities. These decals can be placed on the sides or rear of your 4x4, giving it a rugged and adventurous look.
4. Animal Tracks
For wildlife enthusiasts, animal track decals are a great choice. You can choose from bear, deer, or wolf tracks to decorate your vehicle. These decals look amazing on the fenders or doors.
5. Tree Line
A tree line decal brings a touch of nature to your 4x4. This design works well along the bottom of your doors or on the rear quarter panels. It's a subtle way to show your love for the forest.
6. Topographic Map
For the true adventurers, a topographic map decal is a unique and eye-catching choice. This design can cover a large area of your vehicle and looks great on the hood or sides.
7. Off-Road Vehicle Silhouette
Show off your pride in your 4x4 with a vehicle silhouette decal. This custom design can be made to match your exact model, making it a truly personalized addition to your ride.
8. Adventure Quotes
Inspirational quotes about adventure and the outdoors make great decals for your 4x4. Place these on your rear window or tailgate to inspire fellow off-roaders.
9. Mud Splatter
Give your vehicle a rugged look with mud splatter decals. These designs make it look like you've just come back from an epic off-road adventure, even when your 4x4 is squeaky clean.
10. Custom Logo
Create your own unique logo or emblem to truly personalize your 4x4. This could be a combination of your initials, favorite off-road elements, or a symbol that represents your love for adventure.
How to Choose the Right Decals for Your 4x4
Picking the perfect decals for your vehicle is important. Here are some tips to help you choose:
Think about the size of your vehicle and how big you want the decals to be.
Consider the color of your 4x4 and choose decals that will stand out.
Pick designs that match your personality and the type of off-roading you enjoy.
Look for high-quality, durable materials that can withstand tough outdoor conditions.
Installing Your Custom Off-Road Decals
Once you've chosen your awesome decals, it's time to put them on your 4x4. Here's how to do it right:
Clean the area where you'll put the decal with soap and water. Make sure it's completely dry.
Measure and mark where you want to place the decal.
Carefully peel off the backing and apply the decal slowly, smoothing out any air bubbles.
Use a credit card or squeegee to press down the decal firmly.
Peel off the transfer tape slowly, making sure the decal stays on your vehicle.
Taking Care of Your Off-Road Decals
To keep your decals looking great for a long time, follow these tips:
Wash your vehicle regularly, but avoid using harsh chemicals on the decals.
Don't use a pressure washer directly on the decals, as it can damage them.
Park in the shade when possible to protect the decals from sun damage.
If a decal starts to peel, gently press it back down and consider using a clear sealant around the edges.
Wrap-Up: Make Your 4x4 Awesome with Custom Decals
Custom off-road decals are a fantastic way to make your 4x4 look amazing and show off your love for adventure. From mountain silhouettes to muddy tire tracks, there's a design out there for every off-road enthusiast. Remember to choose high-quality decals, install them carefully, and take good care of them to keep your vehicle looking great for years to come.
Ready to transform your 4x4 into an off-road masterpiece? Check out North American Decal for all your custom printing needs. They specialize in vehicle wraps, safety labels, window graphics, and large-format signs. Whether you need silkscreen or digital printing, North American Decal has the expertise to bring your off-road decal dreams to life. Visit northamericandecal.com today and start your journey to an awesome-looking 4x4!

Personalize Your Ride: Top 10 Custom MX Decals for Dirt Bike Enthusiasts
Are you ready to make your dirt bike stand out from the crowd? Custom MX decals are the perfect way to add your personal style to your ride. In this article, we'll explore the top 10 custom MX decal designs that are sure to turn heads on the track. Whether you're a seasoned pro or a weekend warrior, these cool graphics will make your bike look awesome. Let's dive in and discover how you can make your dirt bike truly unique!
Why Custom MX Decals are Awesome
Before we jump into the top 10 designs, let's talk about why custom MX decals are so great. First off, they make your bike look super cool. You can choose designs that match your personality or favorite colors. Plus, decals help protect your bike's plastic parts from scratches and wear. They're like a shield for your bike that also looks amazing!
The Top 10 Custom MX Decal Designs
1. Classic Flame Designs
Flame designs never go out of style. They make your bike look fast even when it's standing still! You can choose from bright reds and oranges or go for a cool blue flame look. These decals are perfect for riders who want a timeless, hot rod-inspired style.
2. Animal-Inspired Graphics
Want to show off your wild side? Animal-inspired graphics are the way to go. Popular choices include fierce wolves, soaring eagles, or sneaky leopards. These designs can make your bike look powerful and exciting. Imagine racing with a roaring lion on your fenders!
3. Shiny Metallic and Chrome Decals
If you want your bike to really shine, metallic and chrome decals are the answer. These eye-catching designs reflect light and make your bike look super sleek. They're great for riders who want a modern, high-tech look.
4. Cool Geometric Patterns
For a more modern and artistic look, try geometric patterns. These decals use shapes like triangles, circles, and lines to create unique designs. They can make your bike look futuristic and stylish. Plus, you can mix and match colors to create your own special look.
5. Patriotic Designs
Show your love for your country with patriotic designs. American flag-inspired decals are very popular, but you can find designs for many different countries. These decals are perfect for riders who want to represent their homeland on the track.
6. Carbon Fiber Look-Alikes
Carbon fiber is a material used in high-end racing bikes. With carbon fiber look-alike decals, you can give your bike that expensive, race-ready appearance without the high cost. These decals have a cool woven pattern that looks just like real carbon fiber.
7. Custom Race Numbers
Every racer needs a number, so why not make yours special? Custom race number decals let you choose the font, color, and style of your numbers. You can make them big and bold or add cool effects to make them stand out.
8. Comic Book Hero Designs
Are you a fan of superheroes? Comic book-inspired decals can turn your bike into a crime-fighting machine! Choose your favorite hero or create your own superhero logo. These fun designs are sure to make you feel like a track superhero.
9. Sponsor Logo Decals
Even if you're not a pro rider, you can make your bike look professional with sponsor logo decals. You can use real sponsor logos or create fake ones for fun. This is a great way to make your bike look like it belongs in a big race.
10. Simple One-Color Designs
Sometimes, less is more. Simple one-color designs can look super cool and clean. Choose a color that matches your bike or goes well with its main color. These designs are perfect for riders who want a sleek, no-fuss look.
How to Choose the Right Custom MX Decals
Picking the right decals for your bike is important. Here are some tips to help you choose:
Think about your riding style. Are you a flashy rider or more laid-back?
Look at your bike's colors. Choose decals that match or complement your bike.
Consider the quality of the decals. Good decals should be tough and last a long time.
Think about where you ride. If you ride in muddy areas, you might want simpler designs that are easier to clean.
Putting on Your New Decals
Once you've chosen your awesome new decals, it's time to put them on your bike. Here are some tips to make it easier:
Clean your bike really well before you start.
Use warm water and a little soap to help position the decals.
Smooth out any air bubbles with a credit card or something similar.
Let the decals dry completely before you ride.
Taking Care of Your Custom MX Decals
To keep your decals looking great, you need to take care of them. Here are some easy ways to do that:
Wash your bike gently after rides.
Don't use harsh cleaning products on the decals.
Store your bike in a cool, dry place when you're not using it.
If a decal starts to peel, fix it right away to prevent more damage.
Wrap-Up: Make Your Dirt Bike Awesome!
Custom MX decals are an awesome way to make your dirt bike look cool and show off your style. From classic flames to superhero designs, there's something for everyone. Remember to choose decals that match your personality and take good care of them. With the right decals, your bike will look amazing on and off the track!
Ready to give your dirt bike a new look? Check out North American Decal for awesome custom printing solutions! They can help you create the perfect decals for your bike, plus they offer other cool stuff like vehicle wraps and signs. Visit northamericandecal.com to start designing your dream bike graphics today!

Elevate Your Models with Top 10 Custom 1:72 Scale Decals
Are you ready to take your model building to the next level? Custom 1:72 scale decals are the secret weapon of expert modelers. These tiny transfers can transform an ordinary kit into a masterpiece. In this article, we'll explore the top 10 custom decals that will make your 1:72 scale models stand out from the crowd. Whether you're a beginner or a seasoned pro, these decals will add that extra touch of realism and personalization to your creations. Let's dive in and discover how to make your models truly unique!
Why Custom Decals Matter in Model Building
Custom decals are like magic for model builders. They let you add tiny details that would be impossible to paint by hand. With custom decals, you can turn a plain model into something special. They help you create unique designs or recreate historical markings with amazing accuracy.
Using custom decals in 1:72 scale is particularly exciting. This scale is popular because it's small enough to display easily but big enough to show lots of detail. Custom decals at this scale can make a huge difference. They can add squadron badges, serial numbers, or even weathering effects that bring your model to life.
Top 10 Custom 1:72 Scale Decals for Model Builders
1. Vintage Aircraft Nose Art
Nose art decals are super popular among modelers. They add personality to your aircraft models. These decals often feature pin-up girls, cartoon characters, or clever sayings. They're a great way to make your model stand out and tell a story.
2. Modern Military Insignia
For those building modern military aircraft, custom insignia decals are a must-have. These include national roundels, squadron badges, and unit markings. They help you recreate specific aircraft with amazing accuracy. High-quality custom decals ensure that even the tiniest details are crisp and clear.
3. Weathering and Wear Effects
Weathering decals are a cool trick for adding realism to your models. They can create the look of chipped paint, rust, or oil stains. These decals are great for beginners who want to add weathering but aren't ready to try advanced painting techniques.
4. Fantasy and Sci-Fi Markings
If you love building models from your favorite movies or games, custom sci-fi decals are perfect. They can include alien alphabets, futuristic company logos, or spacecraft registration numbers. These decals let you bring your imagination to life in miniature form.
5. Racing Stripes and Sponsors
For fans of model cars and racing planes, custom racing decals are exciting. They include sponsor logos, racing numbers, and colorful stripes. With these decals, you can recreate famous racers or design your own dream machine.
6. Historical Accuracy Upgrades
Sometimes, the decals that come with model kits aren't quite right. Custom historical accuracy decals fix this problem. They offer correct markings for specific units or time periods. These are great for history buffs who want their models to be as accurate as possible.
7. Cockpit Instrument Panels
Tiny cockpit instrument decals can make a big difference in your model's realism. These decals show all the dials and screens in an aircraft cockpit. They're incredibly detailed, even in 1:72 scale. Adding these can really impress other modelers who look closely at your work.
8. Custom Name and Serial Number Sets
Want to personalize your model? Custom name and serial number decals are the way to go. You can add your own name as the pilot or create a unique identifier for your model. It's a fun way to make each of your builds special.
9. Environmental and Nature Decals
For diorama builders, environmental decals are super helpful. These can include leaves, grass tufts, or even water effects. They help you create realistic scenes around your models without needing advanced scenery-making skills.
10. Vintage Advertising and Signage
If you're into civilian aircraft or vehicles, vintage advertising decals are really cool. They let you add old-fashioned logos or advertisements to your models. These decals can transport your model back in time, making it look like it's from a specific era.
How to Apply Custom 1:72 Scale Decals
Applying custom decals might seem tricky, but it's actually pretty easy with a little practice. Here's a simple guide:
Cut out your decal carefully.
Dip it in warm water for about 30 seconds.
Slide the decal onto your model.
Use a soft brush to position it correctly.
Gently pat it dry with a soft cloth.
Let it dry completely before handling the model.
Remember, patience is key when applying decals. Take your time, and you'll get great results!
Why 1:72 Scale is Perfect for Custom Decals
The 1:72 scale is awesome for custom decals for a few reasons:
It's small enough to fit many models in your collection.
There's a huge variety of kits available in this scale.
Custom decals can add lots of detail, even at this small size.
It's a great scale for beginners and experts alike.
Many modelers love 1:72 scale because it offers a good balance between detail and size. Custom decals help you make the most of this popular scale.
Printing Techniques for Custom 1:72 Scale Decals
There are a few ways to print custom decals:
Inkjet printing is common and works well for most decals.
Laser printing can be more durable but requires special paper.
Professional printing services offer the highest quality for complex designs.
Each method has its pros and cons. Inkjet is easy to do at home, while professional printing gives the best results for tricky designs.
Top Manufacturers of 1:72 Scale Decals
Some of the best decal makers for 1:72 scale models include:
Cartograf: Known for super high quality and accuracy.
Eduard: Offers great detail in their decals.
Microscale: A favorite among many modelers for their variety.
These companies make decals that are easy to use and look great on your models.
Wrapping Up: Making Your Models Unique
Custom 1:72 scale decals are an awesome way to make your models special. They let you add amazing detail and personalization to your builds. Whether you're recreating a historical aircraft or designing your own fantasy spaceship, custom decals can help bring your vision to life.
Remember these key points:
Custom decals add unique details to your models.
1:72 scale offers a great balance of size and detail.
Applying decals is easy with a little practice.
There are decals for every kind of model and style.
So why not give custom decals a try on your next model? They're sure to take your builds to the next level!
---
Ready to elevate your models with custom decals? Check out North American Decal for all your custom printing needs! We specialize in high-quality decals, vehicle wraps, safety labels, and more. Whether you're a model enthusiast or a business looking for branding solutions, we've got you covered. Visit northamericandecal.com to explore our services and bring your ideas to life!

Top 10 Custom UTV Decal Ideas for Standout Rides
Are you tired of your UTV looking just like everyone else's? Want to make your ride really pop? Custom decals are an awesome way to give your UTV some personality and make it stand out from the crowd. In this article, we'll share 10 cool ideas for UTV decals that will take your ride to the next level. Whether you're into bold designs or subtle touches, we've got something for everyone. Let's dive in and explore how you can make your UTV uniquely yours!
Why Customize Your UTV with Decals?
Before we jump into the fun ideas, let's talk about why decals are so great for UTVs. First off, they're an easy and affordable way to change up your ride's look. You don't need to spend a ton of money on a full paint job. Decals also protect your UTV's surface from scratches and dings. Plus, they let you show off your style and interests. Whether you're a hunter, a racer, or just love the outdoors, there's a decal design that's perfect for you.
Top 10 Custom UTV Decal Ideas
1. Camo Patterns
If you use your UTV for hunting or just love the outdoorsy look, camo patterns are a great choice. You can go for traditional green and brown camo or try something different like snow camo or digital camo. These designs help your UTV blend in with nature and look super cool.
2. Bright Colors and Geometric Shapes
Want your UTV to really pop? Try bright colors and bold geometric shapes. Think neon stripes, colorful triangles, or eye-catching zigzags. This style is perfect for those who want to be noticed on the trails or at UTV events.
3. Brand-Specific Designs
Show some love for your UTV's brand with custom decals. Whether you ride a Polaris, Can-Am, or another make, you can find or create decals that match your vehicle's brand colors and style. It's a great way to show brand loyalty and make your UTV look even more polished.
4. Patriotic Themes
Proud of your country? Patriotic decals are always popular. You can go all out with flag designs or keep it subtle with small touches of red, white, and blue. These decals look great and show off your national pride.
5. Sports-Inspired Decals
Are you a big sports fan? Why not bring that passion to your UTV? Decals inspired by your favorite team's colors or logos can make your ride feel like a rolling tribute to your team. It's a fun way to combine your love of sports with your love of off-roading.
6. Nature-Inspired Designs
For nature lovers, decals featuring landscapes, animals, or outdoor scenes can be perfect. Imagine having a beautiful forest scene or a majestic mountain range on your UTV. These designs not only look great but also show your appreciation for the outdoors.
7. Custom Numbers and Names
Make your UTV truly yours by adding your name, nickname, or a special number. This is especially popular with racers, but anyone can do it. It's a simple way to personalize your ride and make it easy to spot in a crowd.
8. 3D Decals
Want to take your decal game to the next level? Try 3D decals. These special stickers create a raised, textured look that really stands out. They can make your UTV look like it has custom bodywork without the high cost.
9. Retro and Vintage Styles
Throw it back with retro-inspired decals. Think classic racing stripes, old-school logos, or vintage patterns. This style is great for giving your modern UTV a touch of nostalgia and classic cool.
10. Reflective Safety Decals
Last but not least, consider adding some reflective decals to your UTV. These aren't just for looks – they can actually make your ride safer, especially if you like to go out at night. You can find reflective decals in cool designs that look great during the day and light up at night.
How to Choose the Right Decals for Your UTV
Now that you've got some ideas, how do you pick the right decals for your UTV? Here are a few things to think about:
Consider where and how you use your UTV. If you're often in rough terrain, you'll want extra-durable decals.
Think about your personal style. Choose designs that reflect your interests and personality.
Look at the color of your UTV. Pick decals that complement or contrast nicely with your vehicle's base color.
Think about the size of the decals. Do you want a full wrap or just a few small accents?
Check the quality of the decals. Good quality vinyl will last longer and look better.
Installing Your Custom UTV Decals
Once you've chosen your decals, it's time to put them on. Here's a quick guide:
Clean your UTV thoroughly. The surface needs to be super clean for the decals to stick well.
Measure and mark where you want the decals to go.
Carefully peel off the backing and apply the decal slowly, smoothing out any bubbles as you go.
Use a squeegee or credit card to press down the decal firmly.
If your decal came with a top layer, peel it off carefully.
Remember, take your time with this process. If you're not confident, you might want to ask a professional for help.
Caring for Your UTV Decals
To keep your new decals looking great, follow these tips:
Wash your UTV regularly with mild soap and water.
Avoid pressure washing directly on the decals.
If you store your UTV outside, consider using a cover to protect it from sun and rain.
Touch up any peeling edges quickly to prevent further damage.
Wrap Up
Custom decals are an awesome way to make your UTV stand out and show off your style. Whether you go for bold and bright or subtle and classy, there's a decal design out there that's perfect for you. Remember to choose quality decals, install them carefully, and take good care of them. With the right decals, your UTV will turn heads wherever you ride!
Ready to give your UTV a fresh new look? Check out North American Decal for custom printing solutions, including amazing vehicle wraps and decals. They offer everything from simple decals to full custom designs, perfect for making your UTV truly one-of-a-kind. Visit their website to explore options and bring your UTV decal dreams to life!

Mastering Dry Transfer Decals: Your Step-by-Step Guide to Perfect Application
Are you ready to unlock the secrets of applying dry transfer decals like a pro? Whether you're a hobbyist, artist, or just someone looking to add a personal touch to your belongings, this guide is your ticket to success. Dry transfer decals offer a fantastic way to add intricate designs and text to various surfaces without the mess of wet applications. Let's dive into the world of these amazing stickers and learn how to use them perfectly!
What Are Dry Transfer Decals?
Dry transfer decals, also known as rub-on transfers, are special stickers that don't need water or glue to stick. They're like magic tattoos for objects! You just rub them onto a surface, and voila - your design appears. These nifty decals are great for adding details to models, decorating crafts, or even sprucing up your personal items.
Getting Ready: What You'll Need
Before we start, let's gather our tools:
Your dry transfer decal
The item you want to decorate
A smooth, hard tool for rubbing (like a popsicle stick or an old credit card)
Some tape
A clean, soft cloth
Make sure your work area is clean and dry. Dust and moisture are not friends of dry transfer decals!
Step-by-Step: Applying Your Decal
1. Clean Your Surface
First things first - clean the spot where you'll put your decal. Use your soft cloth to wipe away any dirt or oils. This helps the decal stick better.
2. Position Your Decal
Now, place your decal exactly where you want it. Be careful - once you start rubbing, you can't move it! If you're nervous, use a piece of tape to hold one edge down. This keeps it from shifting while you work.
3. Time to Rub!
Here comes the fun part! Take your rubbing tool and start gently pressing on the decal. Work from one side to the other, using firm, even pressure. You might see the decal changing color slightly - that's a good sign! It means it's transferring to your surface.
4. Check Your Progress
Slowly lift one corner of the decal sheet. If the design is sticking to your item, great! If not, lay it back down and keep rubbing those spots that didn't transfer.
5. The Big Reveal
Once you're sure everything has transferred, carefully peel off the backing sheet. Ta-da! Your design should now be proudly displayed on your item.
6. Final Touches
Give your newly applied decal a final, gentle rub with your finger. This helps ensure all parts are stuck down well.
Tips for Success
Practice on something unimportant first. It's like riding a bike - you'll get better with practice!
Work slowly and patiently. Rushing can lead to mistakes.
If your decal isn't sticking well, try rubbing a bit harder.
For extra protection, you can add a clear coat over your decal once it's fully dry.
Common Mistakes to Avoid
Not cleaning the surface: Always start with a clean slate!
Moving the decal: Once you start rubbing, keep it still.
Rubbing too hard: Gentle but firm pressure is key.
Forgetting to check: Lift a corner to make sure it's transferring properly.
Rushing: Take your time for the best results.
Why Choose Dry Transfer Decals?
Dry transfer decals are awesome for many reasons:
They're easy to use - no water or special tools needed.
They look super crisp and clean when applied correctly.
You can use them on lots of different surfaces.
They're great for adding small, detailed designs.
There's no messy glue or long drying times.
Fun Projects to Try
Now that you know how to apply dry transfer decals, here are some cool ideas to try:
Decorate your school supplies with fun designs.
Add numbers or names to sports equipment.
Create custom labels for your room or toy boxes.
Make unique greeting cards with special messages.
Personalize your bike or skateboard.
Caring for Your Decals
To keep your decals looking great:
Avoid scratching or rubbing them too hard.
Keep them out of direct sunlight if possible.
Clean them gently with a soft, damp cloth.
If they start peeling, you can try pressing them down again.
Wrapping Up
Applying dry transfer decals is a fun and easy way to add cool designs to almost anything. With a little practice and patience, you'll be a decal master in no time! Remember to take your time, keep everything clean, and enjoy the process. Before you know it, you'll be decorating everything in sight!
Here's a quick recap of the most important things to remember:
Clean your surface first
Position your decal carefully
Rub gently but firmly
Check your progress as you go
Take your time and have fun!
Now that you're an expert on applying dry transfer decals, why not put your skills to the test? And if you're looking for high-quality decals and other custom printing solutions, check out North American Decal. They offer a wide range of products, from vehicle wraps to safety labels and window graphics. Whether you're working on a personal project or need branding solutions for your business, they've got you covered. Visit North American Decal to explore their services and start your next creative adventure!

Ride in Style: Top 10 Bell Helmet Decal Designs for Motorcyclists
Are you looking to make your Bell motorcycle helmet stand out? You're in the right place! This article will show you the coolest decal designs for Bell helmets. We'll also explain why personalizing your helmet is a great idea and how to do it safely. Whether you're a speed demon or a casual rider, there's a perfect design waiting for you. Let's dive in and discover how to make your helmet as unique as your riding style!
Why Customize Your Bell Helmet?
Putting decals on your Bell helmet isn't just about looking cool (though that's a big part of it!). Here are some reasons why riders love to personalize their helmets:
Stand Out from the Crowd: A custom helmet helps you express your personality and style. It makes you easy to spot in a group of riders.
Improved Safety: Bright, eye-catching designs can make you more visible to other drivers on the road. This is especially helpful when riding at night or in bad weather.
Show Your Passion: Whether you love a certain bike brand, racing team, or just motorcycling in general, your helmet can showcase what you're passionate about.
Protection for Your Helmet: Quality decals can actually help protect your helmet's surface from scratches and minor damage.
Remember, while customizing is fun, always make sure your decals don't interfere with the helmet's safety features. Now, let's check out some awesome design ideas!
Top 10 Bell Helmet Decal Designs
1. Classic Retro Vibes
Retro designs never go out of style. Think bold stripes, checkered patterns, or designs that look like they're straight out of the 1970s. These decals give your helmet a cool, vintage look that's perfect for riders who appreciate the classics.
2. Modern Geometric Patterns
For a more contemporary look, geometric patterns are the way to go. These designs feature clean lines, shapes, and bold colors. They can range from simple and minimalist to complex and eye-catching.
3. Racing Stripes and Numbers
Channel your inner speed racer with racing stripes and numbers. This design is perfect for sport bike enthusiasts or anyone who loves the thrill of speed. You can customize the colors to match your bike or choose your lucky number.
4. Personalized Name or Initials
Make your helmet truly yours by adding your name or initials. This design is not only personal but also practical – it helps identify your helmet if you're at a rally or event with lots of other riders.
5. Nature-Inspired Designs
Bring a touch of the outdoors to your ride with nature-inspired decals. Think leafy patterns, mountain silhouettes, or even animal prints. These designs are great for adventure riders or those who love to explore the great outdoors.
6. Glow-in-the-Dark and Reflective Decals
Safety meets style with glow-in-the-dark or reflective decals. These designs look cool during the day and help keep you visible at night. They're a smart choice for riders who often find themselves on the road after dark.
7. Minimalist Lines and Shapes
Sometimes, less is more. Minimalist designs featuring simple lines or shapes can give your helmet a sleek, modern look. These decals are perfect for riders who prefer a clean, understated style.
8. Motorcycle Culture Motifs
Show your love for bike culture with decals featuring classic motorcycle symbols. Think wings, flames, or even your favorite bike brand logo. These designs let everyone know you're passionate about riding.
9. Artistic Abstracts
For the creative riders out there, abstract designs offer endless possibilities. From swirling patterns to splashes of color, these decals turn your helmet into a wearable work of art.
10. Patriotic Themes
Proudly display your national colors or symbols with patriotic-themed decals. Whether it's stars and stripes, your country's flag, or national emblems, these designs let you show your pride wherever you ride.
How to Apply Decals to Your Bell Helmet
Now that you've picked your favorite design, let's talk about how to put those decals on your helmet. Here's a simple guide:
Clean Your Helmet: Start with a clean, dry helmet. Use mild soap and water, then let it dry completely.
Plan Your Design: Decide where you want each decal before you start. You can use masking tape to mark spots if needed.
Peel and Stick: Carefully peel off the backing of your decal. Place it on the helmet and smooth it down from the center outwards.
Remove Air Bubbles: Use a credit card or squeegee to push out any air bubbles. Work slowly to avoid tearing the decal.
Let It Set: Give your decals time to stick properly. Avoid riding for at least 24 hours after applying them.
Remember, always follow the instructions that come with your decals for the best results.
Where to Find Quality Bell Helmet Decals
You can find great decals for your Bell helmet in several places:
Online Marketplaces: Websites like Etsy or Amazon offer a wide variety of decals from different sellers.
Motorcycle Gear Shops: Many stores that sell bike gear also offer helmet decals.
Custom Decal Makers: Some companies specialize in making custom decals just for you.
Bell's Official Website: Check out Bell's own site for decals designed specifically for their helmets.
When choosing where to buy, look for sellers with good reviews and clear pictures of their products.
Safety First: Decals and Helmet Safety
While decals are a great way to customize your helmet, safety should always come first. Here are some important things to remember:
Don't Cover Important Parts: Make sure your decals don't cover any vents, visors, or safety features of the helmet.
Use Quality Materials: Cheap decals might peel off easily or damage your helmet's surface. Invest in good quality ones.
Avoid Thick or Heavy Decals: Stick to thin, lightweight decals that won't affect the helmet's structure.
Check Regularly: Inspect your decals often to make sure they're not peeling or coming loose.
By following these guidelines, you can enjoy a stylish helmet without compromising on safety.
Wrapping Up: Your Unique Ride Awaits
Customizing your Bell helmet with cool decals is a fun way to express yourself and stand out on the road. From classic retro designs to modern abstracts, there's a perfect style for every rider. Remember to choose quality decals, apply them carefully, and always prioritize safety.
Your helmet is more than just protection – it's a part of your riding identity. So why not make it as unique as you are? Pick your favorite design, follow our tips, and hit the road with a helmet that's all your own.
Ready to give your Bell helmet a makeover? For high-quality custom decals and printing solutions, check out North American Decal. They offer a wide range of services including vehicle wraps, safety labels, and large-format signs. Visit northamericandecal.com to explore their custom printing options and start designing your perfect helmet decal today!

Custom Big Tex Trailer Decals: Design & Apply Like a Pro
Are you looking to make your Big Tex trailer stand out? Custom decals are a great way to do it! This guide will show you how to design and apply awesome decals to your trailer. Whether you want to promote your business or just add some style, we've got you covered. Let's dive in and learn how to make your Big Tex trailer look amazing!
Why Custom Decals Matter
Custom decals aren't just for show. They can:
Make your trailer look cool
Advertise your business
Protect your trailer's paint
Make your trailer easier to spot
Choosing the Right Decal Material
The first step is picking the right material for your decals. You want something that will last and look good. Here are two main types:
Vinyl Decals: These are popular because they're tough and easy to apply. They come in many colors and can handle outdoor use.
Reflective Decals: These shine when light hits them. They're great for safety and making your trailer visible at night.
When choosing, think about how long you want the decals to last and where you'll put them on your trailer.
Designing Your Decals
Now comes the fun part - designing your decals! Here are some tips:
Keep it simple: Don't use too many words or details. People should be able to read your decal quickly.
Use bright colors: This will help your decal stand out.
Think big: Make sure your design is big enough to see from far away.
Match your brand: If you're advertising a business, use your logo and company colors.
You can use simple design tools on your computer or even draw your design by hand. If you're not artistic, don't worry! Many decal companies can help you create a design.
Preparing Your Trailer
Before you put on your decals, you need to get your trailer ready. Follow these steps:
Wash your trailer well. Use soap and water to remove all dirt and grime.
Dry the trailer completely. Any water left will stop the decal from sticking.
If there are old decals, remove them carefully.
Clean the area again where you'll put the new decals.
Taking time to prepare will help your new decals look better and last longer.
Applying Your Decals
Now it's time to put on your decals! Here's how to do it:
Choose a warm, dry day. Decals stick better when it's not too cold or wet.
Measure where you want to put the decal and mark it lightly with a pencil.
Peel off a small part of the backing paper.
Line up the decal with your marks and start pressing it onto the trailer.
Slowly peel off more backing paper as you go, smoothing the decal with your hand.
Use a credit card or squeegee to push out any air bubbles.
Peel off the transfer tape (if your decal has it) very carefully.
Take your time with this step. It's better to go slow and get it right than to rush and make mistakes.
Caring for Your Decals
To keep your decals looking great, follow these tips:
Wash your trailer regularly, but don't use harsh chemicals on the decals.
Avoid pressure washing directly on the decals.
Park in the shade when you can to protect the decals from too much sun.
If a decal starts to peel, press it back down and seal the edges.
With good care, your decals can last for years!
Special Tips for Big Tex Trailers
Big Tex trailers are tough, but they have some special areas to think about when applying decals:
Avoid putting decals on areas that get a lot of wear, like where you load and unload.
Be careful around rivets and screws. You might need to cut the decal to fit around them.
The sides of the trailer are great for big decals that people can see easily.
Making Your Trailer Work for You
Custom decals can turn your Big Tex trailer into a moving billboard. If you have a business, this is a great way to advertise. Even if you don't, cool decals can make your trailer stand out at campgrounds or job sites.
Think about what message you want to send with your decals. Do you want to show off your company name? Or maybe you want to add some cool graphics that match your personality. Whatever you choose, make sure it represents you or your business well.
Safety First
Remember, while decals are fun and useful, safety comes first. Make sure your decals don't cover any important safety features or lights on your trailer. Also, check your local laws about what kind of decals you can put on trailers. Some places have rules about how big decals can be or what they can say.
Wrapping Up
Custom decals are a fantastic way to make your Big Tex trailer unique. With the right design and careful application, you can transform your trailer into something special. Whether you're advertising your business or just adding some personal style, decals are a great choice.
Remember these key points:
Choose the right material for your needs
Keep your design simple and bold
Prepare your trailer surface carefully
Take your time when applying the decals
Care for your decals to make them last
Now you're ready to create amazing custom decals for your Big Tex trailer. Have fun and show off your style!
---
Ready to take your trailer to the next level with custom decals? Let the experts at North American Decal help! We specialize in creating high-quality, custom printing solutions for all your needs, including trailer decals, vehicle wraps, safety labels, and more. Our team of professionals can guide you through the design process and ensure a perfect application. Visit North American Decal today to get started on your custom decal project!

FMCSA Decal Requirements: What Every Carrier Needs to Know
Are you a commercial vehicle operator wondering about the rules for marking your trucks? You've come to the right place! This guide will walk you through everything you need to know about FMCSA decal requirements. We'll cover why these rules matter, what you need to do to follow them, and how to avoid costly mistakes. Whether you're new to the industry or just need a refresher, this article will help you stay on the right side of the law.
What Are FMCSA Decal Requirements?
FMCSA stands for the Federal Motor Carrier Safety Administration. This government agency sets rules for commercial trucks and buses to keep our roads safe. One of these rules is about how vehicles should be marked. These markings help identify trucks and their owners quickly, which is important for safety and law enforcement.
The main things you need to know are:
You must display your USDOT number on both sides of your vehicle.
You need to show your company's name or trade name.
These markings must be easy to see and read.
Let's dive deeper into each of these points.
Who Needs a USDOT Number?
Not every truck needs a USDOT number. You need one if:
You carry passengers for a fee across state lines
You transport cargo between states
You carry hazardous materials, even if you stay in one state
If any of these apply to you, you'll need to get a USDOT number and display it on your vehicles.
How to Get a USDOT Number
Getting a USDOT number is pretty straightforward. Here's what you do:
Go to the FMCSA website
Fill out a form called MCS-150
Wait for your number to be assigned
Once you have your number, you're ready to put it on your trucks.
Where to Put Your USDOT Number
The rules about where to put your USDOT number are clear:
It must be on both sides of your truck
It should be easy to see from 50 feet away
The color should stand out against your truck's paint
Most companies put their USDOT number on the doors of the truck cab. This is a good spot because it's easy to see and read.
How Big Should the Numbers Be?
Size matters when it comes to USDOT numbers. The rules say:
The numbers must be at least 2 inches tall
They should be bold and easy to read
Think about it like this: if someone can't read your number from across the street, it's probably too small.
What About Your Company Name?
Besides your USDOT number, you also need to show your company name. This should be:
The same name you used on your MCS-150 form
Visible on both sides of the truck
Easy to read from 50 feet away
You can use your legal company name or a trade name, but it must match your official records.
When Do You Need to Update Your Markings?
Things change in business, and sometimes that means your truck markings need to change too. You should update your markings:
When you get new trucks
If you repaint your trucks
If your company name changes
Every two years when you update your USDOT information
Keeping your markings up to date is just as important as having them in the first place.
What Happens If You Don't Follow the Rules?
The FMCSA takes these rules seriously. If you don't follow them, you could face:
Fines
Points on your safety record
Being taken off the road until you fix the problem
It's much easier (and cheaper) to follow the rules from the start.
Common Questions About FMCSA Decal Requirements
Here are some questions people often ask about these rules:
Do I need a USDOT number if I only drive in one state?
Usually not, unless you carry hazardous materials. But some states have their own rules, so it's best to check.
Can I use magnetic signs for my USDOT number?
Yes, as long as they're securely attached and meet all the other requirements.
What if my truck is a different color than my usual company colors?
Your USDOT number and company name still need to be visible. You might need to use a different color for the markings to make sure they stand out.
Do I need to remove old markings if I buy a used truck?
Yes. You should remove or cover any old markings and put your own information on the truck.
Wrapping Up: Key Points to Remember
Let's review the most important things to remember about FMCSA decal requirements:
Display your USDOT number and company name on both sides of your trucks
Make sure the markings are at least 2 inches tall and visible from 50 feet away
Use colors that stand out against your truck's paint
Keep your information up to date
Follow the rules to avoid fines and safety violations
Following these rules helps keep our roads safe and your business running smoothly. It might seem like a small thing, but proper vehicle marking is an important part of being a responsible carrier.
---
Looking for high-quality decals and markings for your commercial vehicles? North American Decal specializes in custom printing solutions, including vehicle wraps, safety labels, window graphics, and large-format signs. We offer services like silkscreen and digital printing to help businesses with their branding and advertising needs. Visit North American Decal to learn more about how we can help you comply with FMCSA requirements and make your fleet look great at the same time!

EZ Loader Trailer Decals: Your Ultimate Guide to Types, Installation, and Care
Are you curious about those stickers on your EZ Loader boat trailer? Well, you're in the right place! This guide will tell you all about EZ Loader trailer decals. We'll explore the different types, show you how to put them on, and teach you how to keep them looking great. Whether you're a boat owner or just love trailers, this article has something for everyone. Let's dive in and discover the world of EZ Loader trailer decals!
What Are EZ Loader Trailer Decals?
EZ Loader trailer decals are special stickers that go on boat trailers. They're not just for looks - these decals are super important! They give you important information about your trailer and help keep you safe. Let's look at the different kinds of decals you might find on an EZ Loader trailer.
VIN Decals
VIN stands for Vehicle Identification Number. It's like your trailer's fingerprint - no two are the same! You'll find this decal on a silver sticker at the front of the trailer. It's usually on the inside of the rail on the passenger side. This decal is super important because it helps identify your trailer and gives you warranty information.
Weight Capacity Decals
These decals tell you how much weight your trailer can safely carry. You'll find this information on the inside rail of your trailer. It's called the GVWR, which stands for Gross Vehicle Weight Rating. This number includes the weight of your boat, engines, fuel, and any other stuff you put on the trailer. It's important to know this number so you don't overload your trailer!
Safety and Maintenance Decals
EZ Loader trailers also have decals that give you important safety tips and tell you how to take care of your trailer. These stickers might warn you about how to attach your trailer properly or how to use safety chains. They're like little reminders to keep you and your boat safe on the road.
Warranty Decals
These decals tell you about your trailer's warranty. For example, some EZ Loader trailers have a 6-year warranty from when they were made, or 5 years from when they were sold. This information is important to know in case something goes wrong with your trailer.
How to Put Decals on Your EZ Loader Trailer
Now that you know about the different types of decals, let's learn how to put them on your trailer. It's not as hard as you might think!
Step 1: Clean the Surface
First, you need to make sure the spot where you're putting the decal is super clean. Use a special boat cleaner that won't hurt the trailer. If there are old stickers, take them off carefully. Always test your cleaner on a small spot first to make sure it's safe.
Step 2: Measure and Position
Next, measure where you want to put the decal. Use a tape measure and mark the middle of where the decal will go. Hold the decal up to the trailer to make sure it fits right. You can use some masking tape to hold it in place while you check.
Step 3: Put the Decal On
Now for the fun part! Carefully peel off the backing paper from the decal. Line it up with the marks you made earlier. Use a plastic tool (like a credit card) to smooth out the decal. Start from the middle and work your way out. This helps get rid of air bubbles.
Step 4: Final Touches
After you've put the decal on, check for any air bubbles. If you see any, gently push them out with your finger. You can also use a special pen to seal the edges of the decal. This helps it stay on better.
Taking Care of Your EZ Loader Trailer Decals
Once you've put your decals on, you'll want to keep them looking good. Here are some tips to help your decals last a long time:
Protect from the Sun: The sun can make decals fade. Use a special wax that protects against UV rays.
Clean Regularly: Wash your trailer often, especially if it's been in saltwater. Use fresh water to rinse it off after each use.
Use the Right Cleaners: Don't use harsh cleaners that might hurt the decals. Look for cleaners made just for vinyl graphics.
Be Careful: When you're moving your trailer around, be careful not to scratch the decals.
Check Often: Look at your decals regularly to make sure they're not peeling or getting damaged.
Cover Up: If you're not using your trailer for a while, consider covering it to protect the decals.
Why EZ Loader Trailer Decals Matter
EZ Loader trailer decals are more than just stickers. They help keep you safe by giving you important information about your trailer. They also make your trailer look good and can even help it last longer. By taking care of your decals, you're taking care of your whole trailer!
Remember, different EZ Loader trailer models might have different decals. Always check your trailer's manual or ask an expert if you're not sure about something.
Taking care of your EZ Loader trailer decals is an important part of being a responsible boat owner. With the tips in this guide, you'll be able to keep your trailer looking great and running safely for years to come.
Key Things to Remember:
EZ Loader trailer decals include VIN, weight capacity, safety, and warranty information.
Clean the surface well before putting on new decals.
Take your time when applying decals to avoid air bubbles.
Protect your decals from sun damage and clean them regularly.
Always follow the information on your trailer's decals for safe use.
Now that you're an expert on EZ Loader trailer decals, you can keep your trailer looking great and running safely. Happy boating!
---
Looking for high-quality decals for your boat trailer or other vehicles? North American Decal specializes in custom printing solutions, including vehicle wraps, safety labels, window graphics, and large-format signs. We offer services like silkscreen and digital printing to businesses looking for top-notch branding and advertising tools. Visit North American Decal to explore our range of products and services, and take your vehicle graphics to the next level!

Top 10 Truck Decal SVG Designs for Custom Graphics
Are you looking to give your truck a fresh new look? Custom decals are a fantastic way to make your vehicle stand out on the road. In this article, we'll explore the world of truck decal SVG designs and show you the top 10 options that can transform your ride from ordinary to extraordinary. Whether you're a business owner wanting to promote your brand or just someone who loves to personalize their vehicle, these SVG designs will help you create stunning custom graphics that turn heads wherever you go.
What Are Truck Decal SVG Designs?
Before we dive into our top picks, let's quickly explain what SVG designs are. SVG stands for Scalable Vector Graphics. These are digital images that can be resized without losing quality. This makes them perfect for truck decals because you can make them as big or small as you want, and they'll always look sharp and clear.
Now, let's check out the coolest truck decal SVG designs that will make your vehicle the talk of the town!
1. The Classic Flame Design
Nothing says "hot rod" like a classic flame design. This timeless decal gives your truck a sporty, adventurous look. The great thing about SVG flame designs is that you can easily change the colors to match your truck or your personal style. Whether you prefer a fiery red or a cool blue, this design will make your truck look like it's burning up the road.
2. Nature-Inspired Mountain Landscape
For outdoor enthusiasts and nature lovers, a mountain landscape decal is a perfect choice. This design typically features silhouettes of mountains, trees, and sometimes even wildlife. It's a great way to show your love for the great outdoors and add a touch of adventure to your truck's appearance.
3. Patriotic American Flag
Show your national pride with a bold American flag decal. This design is popular among truck owners who want to display their patriotism. SVG flag designs can be customized to look weathered for a vintage feel or kept crisp and clean for a more modern look.
4. Tribal Patterns
Tribal designs have been popular for years, and they're still a great choice for truck decals. These intricate patterns can be applied to various parts of your truck, from the hood to the sides. The beauty of SVG tribal designs is that they can be easily modified to create a unique look that's all your own.
5. Company Logo or Brand
If you're a business owner, why not turn your truck into a moving advertisement? Creating an SVG version of your company logo allows you to apply it to your vehicle in any size. This is a smart way to promote your brand wherever you go.
6. Wild Animal Silhouettes
Animal lovers rejoice! Decals featuring silhouettes of wolves, eagles, or lions are incredibly popular. These designs often symbolize strength and freedom, making them a perfect match for trucks. With SVG files, you can easily adjust the size and position of these animal silhouettes to fit your truck perfectly.
7. Geometric Patterns
For those who prefer a more modern look, geometric patterns are an excellent choice. These designs can range from simple repeating shapes to complex, abstract patterns. The precision of SVG files ensures that even the most intricate geometric designs look crisp and clean on your truck.
8. Custom Text and Quotes
Sometimes, you want to say it with words. Custom text decals are a great way to display your favorite quote, slogan, or even your truck's nickname. With SVG designs, you can choose from countless fonts and styles to create text that truly expresses your personality.
9. Skull Designs
For those who like to add a bit of edge to their truck's appearance, skull designs are always popular. From simple skull outlines to more detailed, artistic renderings, these decals can give your truck a bold, rebellious look.
10. Racing Stripes
Last but not least, racing stripes are a classic truck decal that never goes out of style. SVG designs make it easy to create perfectly straight and even stripes that can run the length of your vehicle. You can go for traditional dual stripes or get creative with unique patterns and color combinations.
How to Apply Your Chosen SVG Decal
Once you've picked your favorite design, it's time to apply it to your truck. Here's a quick guide to help you get started:
Clean the area where you'll apply the decal thoroughly.
Print your SVG design on vinyl using a vinyl cutter.
Use transfer tape to lift the cut vinyl design.
Carefully position the decal on your truck.
Slowly peel away the transfer tape, making sure the decal sticks to the truck.
Use a squeegee or credit card to smooth out any bubbles.
Remember, practice makes perfect. If you're new to applying decals, you might want to start with a smaller design to get the hang of it.
Why Choose SVG Designs for Your Truck Decals?
SVG designs are awesome for truck decals because:
They can be resized without losing quality
You can easily change colors and modify designs
They're perfect for creating crisp, clean lines
They work well for both simple and complex designs
Whether you're a professional trucker looking to stand out on the highway or just want to give your personal vehicle some extra flair, these top 10 truck decal SVG designs offer something for everyone. From classic flames to modern geometric patterns, there's a design out there that's perfect for your ride.
So, what are you waiting for? It's time to give your truck the makeover it deserves with an eye-catching custom decal. Your vehicle is more than just a way to get from point A to point B – it's an expression of who you are. Make it count!
Ready to turn your truck into a rolling work of art? Visit North American Decal for all your custom printing needs. From vehicle wraps to safety labels and large-format signs, they've got you covered. Transform your truck today and make a statement on the road!

Top 10 Browning Truck Decals for Outdoor Enthusiasts
Are you a proud outdoorsman looking to show off your passion? Look no further! Browning truck decals are the perfect way to personalize your ride and connect with fellow nature lovers. In this article, we'll explore the top 10 Browning decals that'll make your truck stand out from the crowd. We'll also dive into the history of the iconic Buckmark logo and share some tips on choosing and applying these awesome decals. So, buckle up and get ready for a wild ride through the world of Browning truck decals!
The Browning Legacy: More Than Just a Logo
Before we jump into our top 10 list, let's take a quick trip down memory lane. The Browning Buckmark logo isn't just a cool design – it's a symbol with a rich history. Back in 1977, a guy named Don Bailey created this awesome logo for Browning's 100th birthday party. He chose a mule deer head because these animals are all over Utah, where Browning calls home.
The Buckmark quickly became super popular. Hunters and outdoor lovers started putting it on everything – hats, jackets, and of course, trucks! It's like a secret handshake for people who love nature and adventure. When you see a Buckmark, you know you've found a friend who shares your passion for the great outdoors.
Top 10 Browning Truck Decals That'll Make You Go Wild
Now, let's dive into the good stuff – the top 10 Browning truck decals that'll make your ride look amazing!
Classic Buckmark: This is the OG of Browning decals. Simple, sleek, and instantly recognizable. It's perfect for any truck and tells the world you're a true outdoor enthusiast.
Camo Buckmark: Take the classic logo and give it a camo makeover. It's like your truck is wearing camouflage! This decal is perfect for hunters who want to blend in with nature (but stand out on the road).
Deer Silhouette with Buckmark: This decal combines the Buckmark with a full deer silhouette. It's like having a majestic deer running alongside your truck!
His and Hers Buckmark: Show off your outdoor love story with this cute decal. It features two Buckmarks – one in pink and one in brown. Perfect for couples who love hunting together!
Browning Name with Buckmark: Can't decide between the logo and the name? Why not have both? This decal features the Browning name with the Buckmark nestled inside the "O".
Tribal Buckmark: Give your truck some edge with this tribal-inspired Buckmark. It's got swirls and flames that make the classic logo look extra cool.
American Flag Buckmark: Show your love for the outdoors and your country with this patriotic decal. The Buckmark gets a stars-and-stripes makeover!
Mossy Oak Buckmark: Combine two iconic outdoor brands with this collaboration decal. The Buckmark gets the Mossy Oak camo treatment for ultimate camouflage coolness.
Browning Family Stick Figures: This fun decal shows a family of stick figures, each with a little Buckmark for a head. It's a great way to show that your whole family loves the outdoors!
3D Buckmark: Make your decal pop with this 3D version of the classic logo. It looks like the Buckmark is jumping right off your truck!
Choosing Your Perfect Browning Decal
Now that you've seen our top picks, you might be wondering how to choose the right one for your truck. Here are some things to think about:
Size matters: Make sure the decal fits well on your truck. A tiny decal might get lost on a big truck, while a huge one could look silly on a smaller vehicle.
Color coordination: Pick a decal color that looks good with your truck's paint job. The classic gold Buckmark looks great on dark-colored trucks, while white or silver might be better for lighter colors.
Placement is key: Think about where you want to put your decal. The rear window is a popular spot, but don't forget about the sides or even the hood!
Your personal style: Choose a decal that matches your personality. If you're bold and outgoing, go for a big, colorful design. If you prefer something more subtle, stick with the classic Buckmark.
Sticking It On: Applying Your Browning Decal
Once you've picked out your awesome new Browning decal, it's time to put it on your truck. Here's how to do it like a pro:
Clean up: Wash the area where you're going to put the decal. Make sure it's super clean and dry.
Plan it out: Before you peel anything, hold the decal up to your truck to make sure you like where it's going.
Peel and stick: Carefully peel off the backing and stick the decal to your truck. Start from one edge and smooth it out as you go.
Bubble trouble: If you see any air bubbles, use a credit card or something similar to smooth them out. Work from the center to the edges.
Final reveal: Some decals have a top layer that you peel off after sticking. If yours does, carefully remove it to reveal your awesome new Browning decal!
Why Browning Decals Rock
So, why should you bother putting a Browning decal on your truck? Here are a few reasons:
Show your passion: Let the world know you love the outdoors and hunting.
Join the club: Connect with other Browning fans and outdoor enthusiasts.
Look cool: Let's face it – Browning decals just make your truck look awesome!
Customize your ride: Make your truck stand out from all the other boring vehicles on the road.
Start conversations: You never know – your Browning decal might help you make new friends who share your interests!
Wrapping It Up
Browning truck decals are an awesome way to show your love for the outdoors and make your ride look cool. Whether you go for the classic Buckmark or something more unique, these decals are sure to turn heads and start conversations. So pick your favorite, stick it on your truck, and hit the road for your next outdoor adventure!
Remember, a Browning decal isn't just a sticker – it's a badge of honor for outdoor enthusiasts. It shows the world that you're part of a community that values nature, adventure, and the thrill of the hunt. So go ahead, proudly display your Buckmark, and let your outdoor spirit shine!
---
Ready to make your truck stand out with an awesome Browning decal or other custom graphics? Check out North American Decal! We specialize in all kinds of custom printing solutions, from vehicle wraps to window graphics. Whether you need a single decal or a full truck wrap, we've got you covered. Visit northamericandecal.com to learn more about our services and start your project today!
Sign up for our newsletter
to get all the latest news and updates for North American Decal